


The Protester's Guide To Gunshot Wounds
Essential skills for every comrade

Less than two days into 2025, the New Year's Eve terrorist attack in New Orleans and the mass shooting in New York City on New Year’s Day already serve as yet another grim reminder that we are in an age of extreme political violence. The bottom line is that we are the ones who need to keep each other safe. With right wing violence continuing to escalate in the lead-up to Inauguration Day, the following information is vital to any folks protesting, demonstrating, or otherwise being visible at any politically organized event. This is an overview of the gear you need and how to use it.
DISCLAIMER 1: This kit is not for minor injuries. Tylenol, Narcan, and bandaids go in a different bag. An IFAK (Individual First Aid Kit) is, to put it bluntly, for “plugging holes.” This kit’s focus is on massive blood loss and massive blood loss only; you’re keeping someone alive long enough to get to the hospital.
DISCLAIMER 2: This kit is useless without training. I urge everyone who isn’t already a trained paramedic to at least take a Stop The Bleed course where you will learn about major blood loss and get hands-on training with test dummies, all for free; and practice, practice, practice! Should you ever need these skills, trust that it will be in a crisis situation and you want this shit on autopilot. Seconds are precious, and you don’t want to waste them trying to remember something.
DISCLAIMER 3: This kit addresses wounds to the limbs (arms and legs), junctional sites (shoulders, pelvis, neck) and sucking chest wounds. If massive hemorrhaging occurs in the chest cavity or abdomen, there’s not much you can do besides get to the hospital as quickly as possible.
DISCLAIMER 4: Should you need this info, you’ll be dealing with patients who are in the scariest moment of their lives. You will need to work fast but talk them through it. Communicate clearly to them what you’re doing for them, why you need to do it, and ALWAYS get verbal consent when possible.
DISCLAIMER 5: Always identify hazards when entering a first aid situation. If you get shot or run over too, you can’t help anyone and will become a casualty yourself. It is noble to put yourself in harm’s way, but don’t do it needlessly.
Bullet wounds are deceptively traumatic to tissue. The holes they leave behind may be small, but the damage is not; bullets travel at nearly three times the speed of sound and as they penetrate flesh that energy expands behind the round, creating cavitation. This ballistics gel demo shows what’s really happening in the milliseconds after impact:
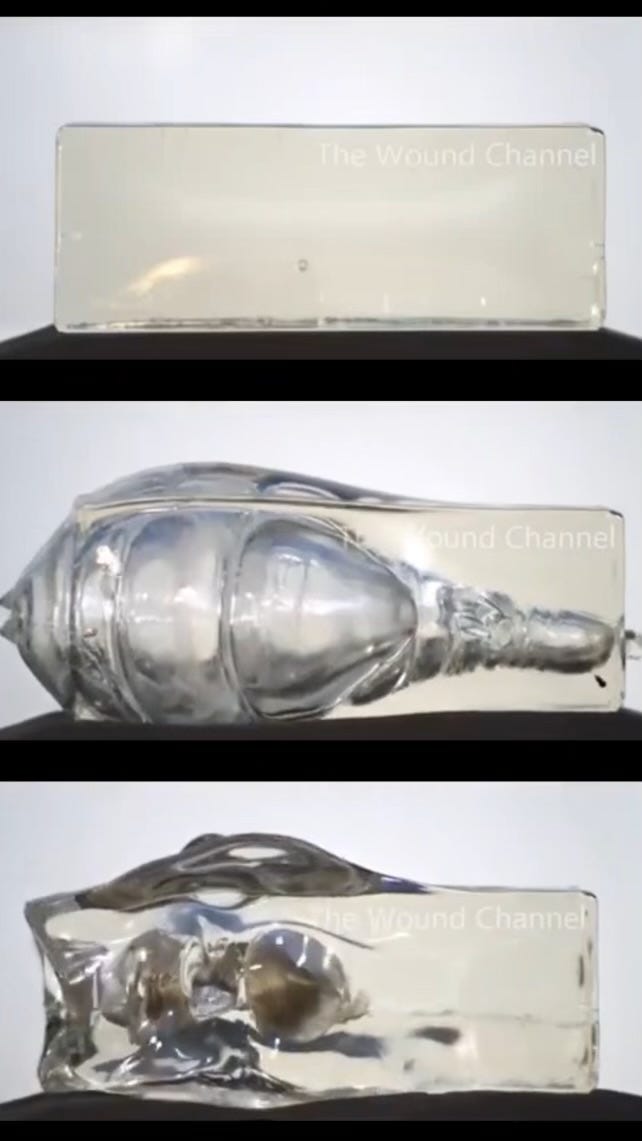
The amount of trauma inflicted by this shockwave, all happening in a matter of milliseconds, breaks bones and severs blood vessels.
A person can bleed to death in as little as 90-120 seconds without immediate intervention.
The name of the game when dealing with gunshot wounds is stopping blood loss. Your goal is to find and address the source of bleeding as quickly as possible and then stabilize the patient using the M.A.R.C.H system:
Massive hemorrhaging (blood loss)
Airway (make sure they can breathe)
Respiration (usually addressing sucking chest wounds)
Circulation (recovery position & fluids)
Hypothermia (keep them warm!)
Our order of operations is as follows:
Assess that the scene is safe enough to render aid
Find the site(s) of the bleeding
Control the bleeding as quickly as possible
Get the patient to a hospital immediately
Assessing the scene:
The scene we will most likely be working on is a mass casualty event, whether by firearm or car crash; in either case it’s safest to approach casualties when you’re reasonably sure that the threat is gone. This can be hard to know for sure in the panic following one of these events. Use your best judgment but remember that if you get shot too, you can’t help anyone. Direct someone, with eye contact and a firm vocal command, to call 911.
Find the site(s) of the bleeding
Gunshot wounds may not be readily apparent at the point of entry for several reasons, like a small entry wound or concealment under clothing. Assuming the patient is not able to speak to you and you see signs of major blood loss—pooling blood, saturated clothing, or a weak and delirious demeanor—search for bleeding by putting on a pair of gloves and performing a “blood sweep:” feeling around the patient’s torso, hips and limbs. Check your gloves for blood and focus on those areas where you find it.
Once you find the wound, immediately remove the surrounding clothing. You can’t put a tourniquet on over someone’s coat or pack gauze with their pants in the way. The quickest way to remove it is with your trauma shears, but just get it off. This process will probably further scare the shit out of somebody who’s already going into shock from being shot, so talk them through it. Explain what you’re doing and why you’re doing it.
Control the bleeding as quickly as possible
Arterial bleeds are easy to spot: bright red blood rhythmically spurting up to several feet stands out. Veinous bleeds will be darker and less aggressive: pooling rather than spurting. If you see either coming from a wound to a limb, apply a tourniquet immediately.
Major blood loss from a junctional site—shoulders, hips, neck—can’t be TQd and require wound packing. You’ll stick a finger into the wound and search for the source of the bleed, and the aforementioned cavitation will have caused immediate and massive swelling of the surrounding tissue so you may have to dig around for it. This will HURT. Talk them through it. Once located, use a hand-over-hand technique to precisely press as much gauze as possible directly onto the bleed.
A sucking chest wound needs to be immediately treated with an occlusive dressing.
Get the patient to the hospital immediately
This is largely out of your control unless someone happens to have a vehicle ready. Your job is to keep the patient stable—keep packed wounds under pressure, monitor tourniquets, burp chest seals, try to keep patients awake and responsive—and communicate with first responders, and hope an ambulance shows up quickly.
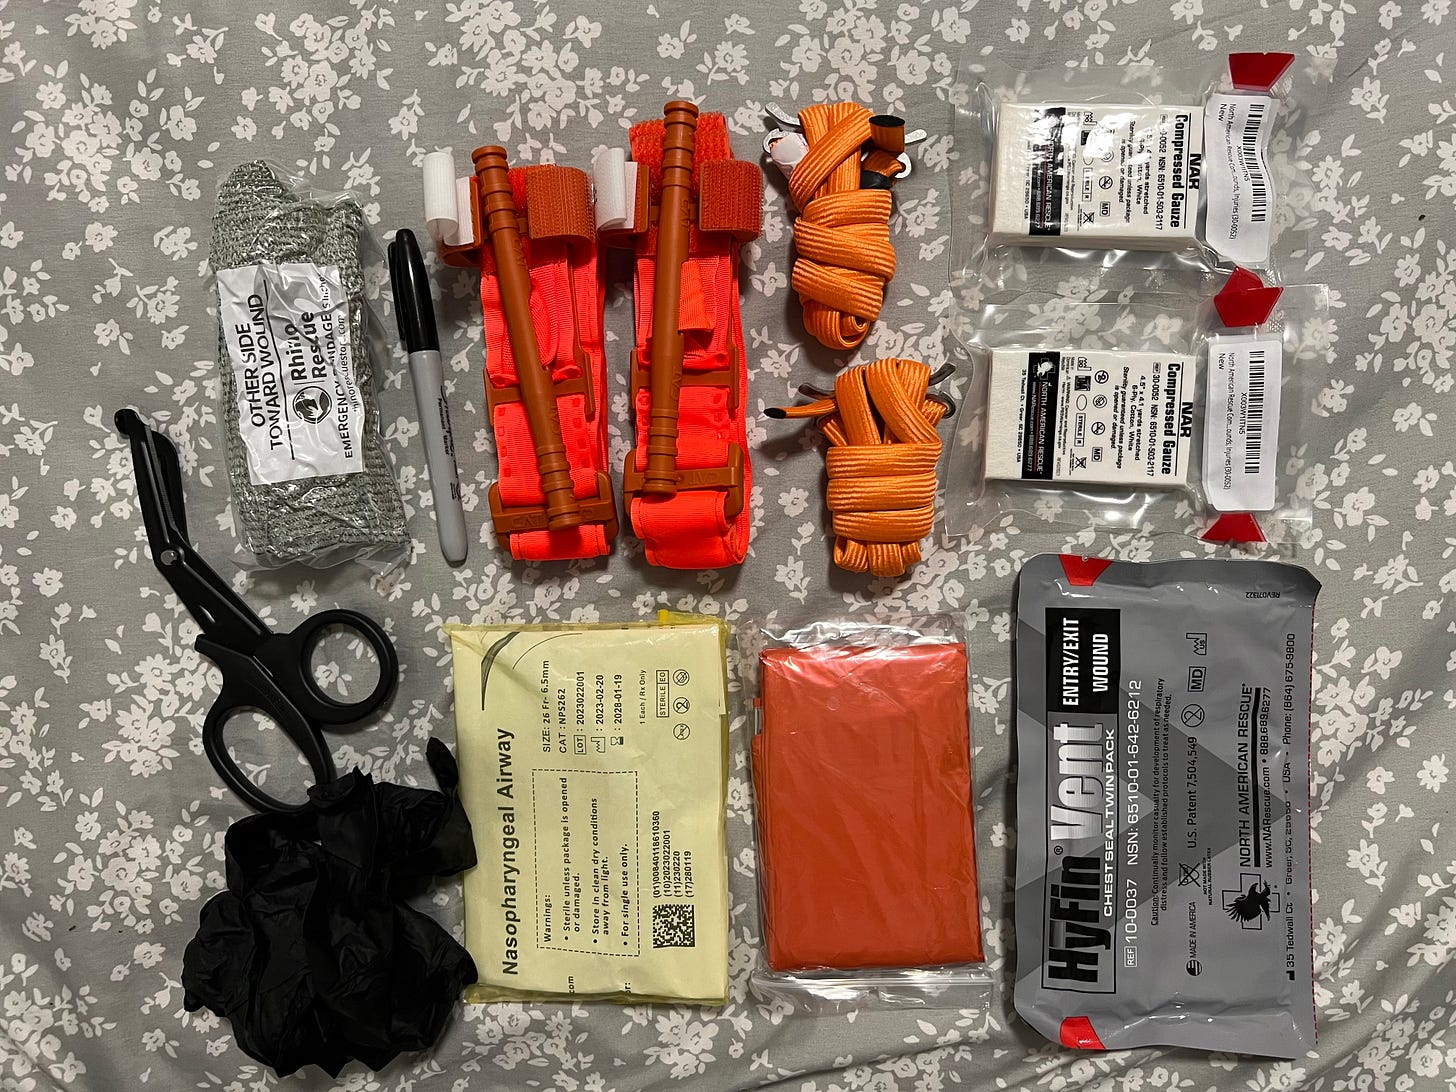
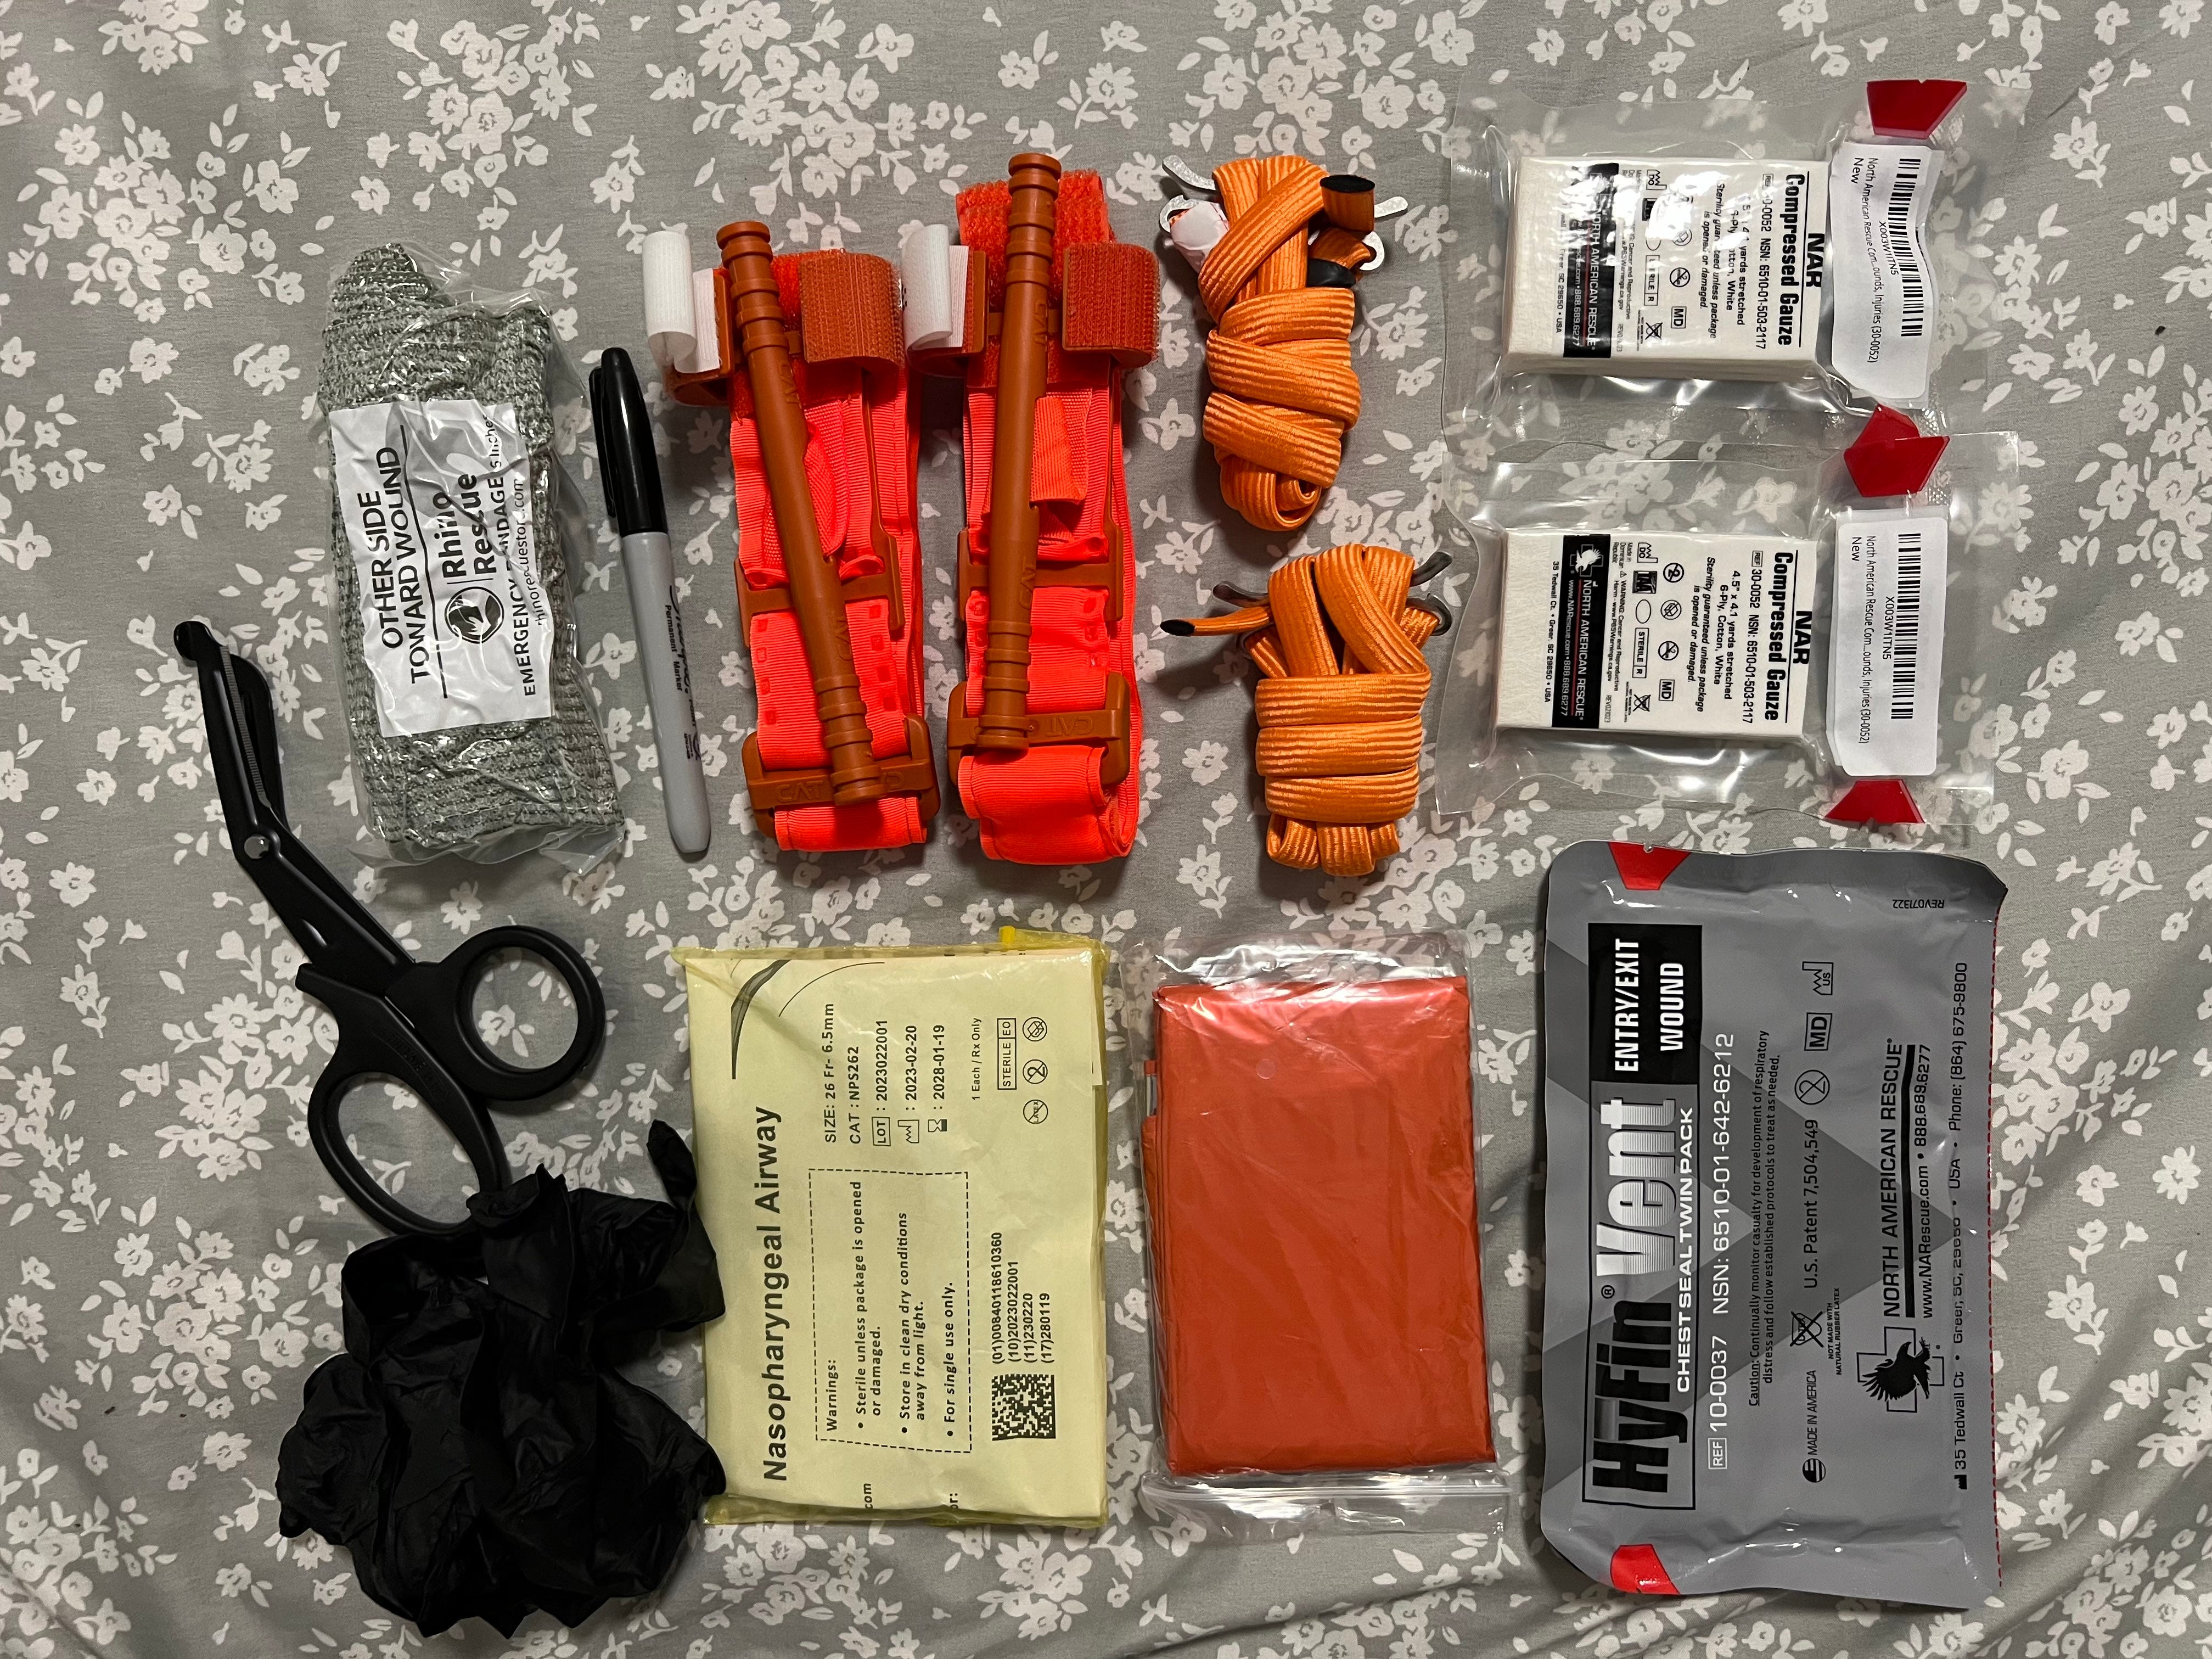
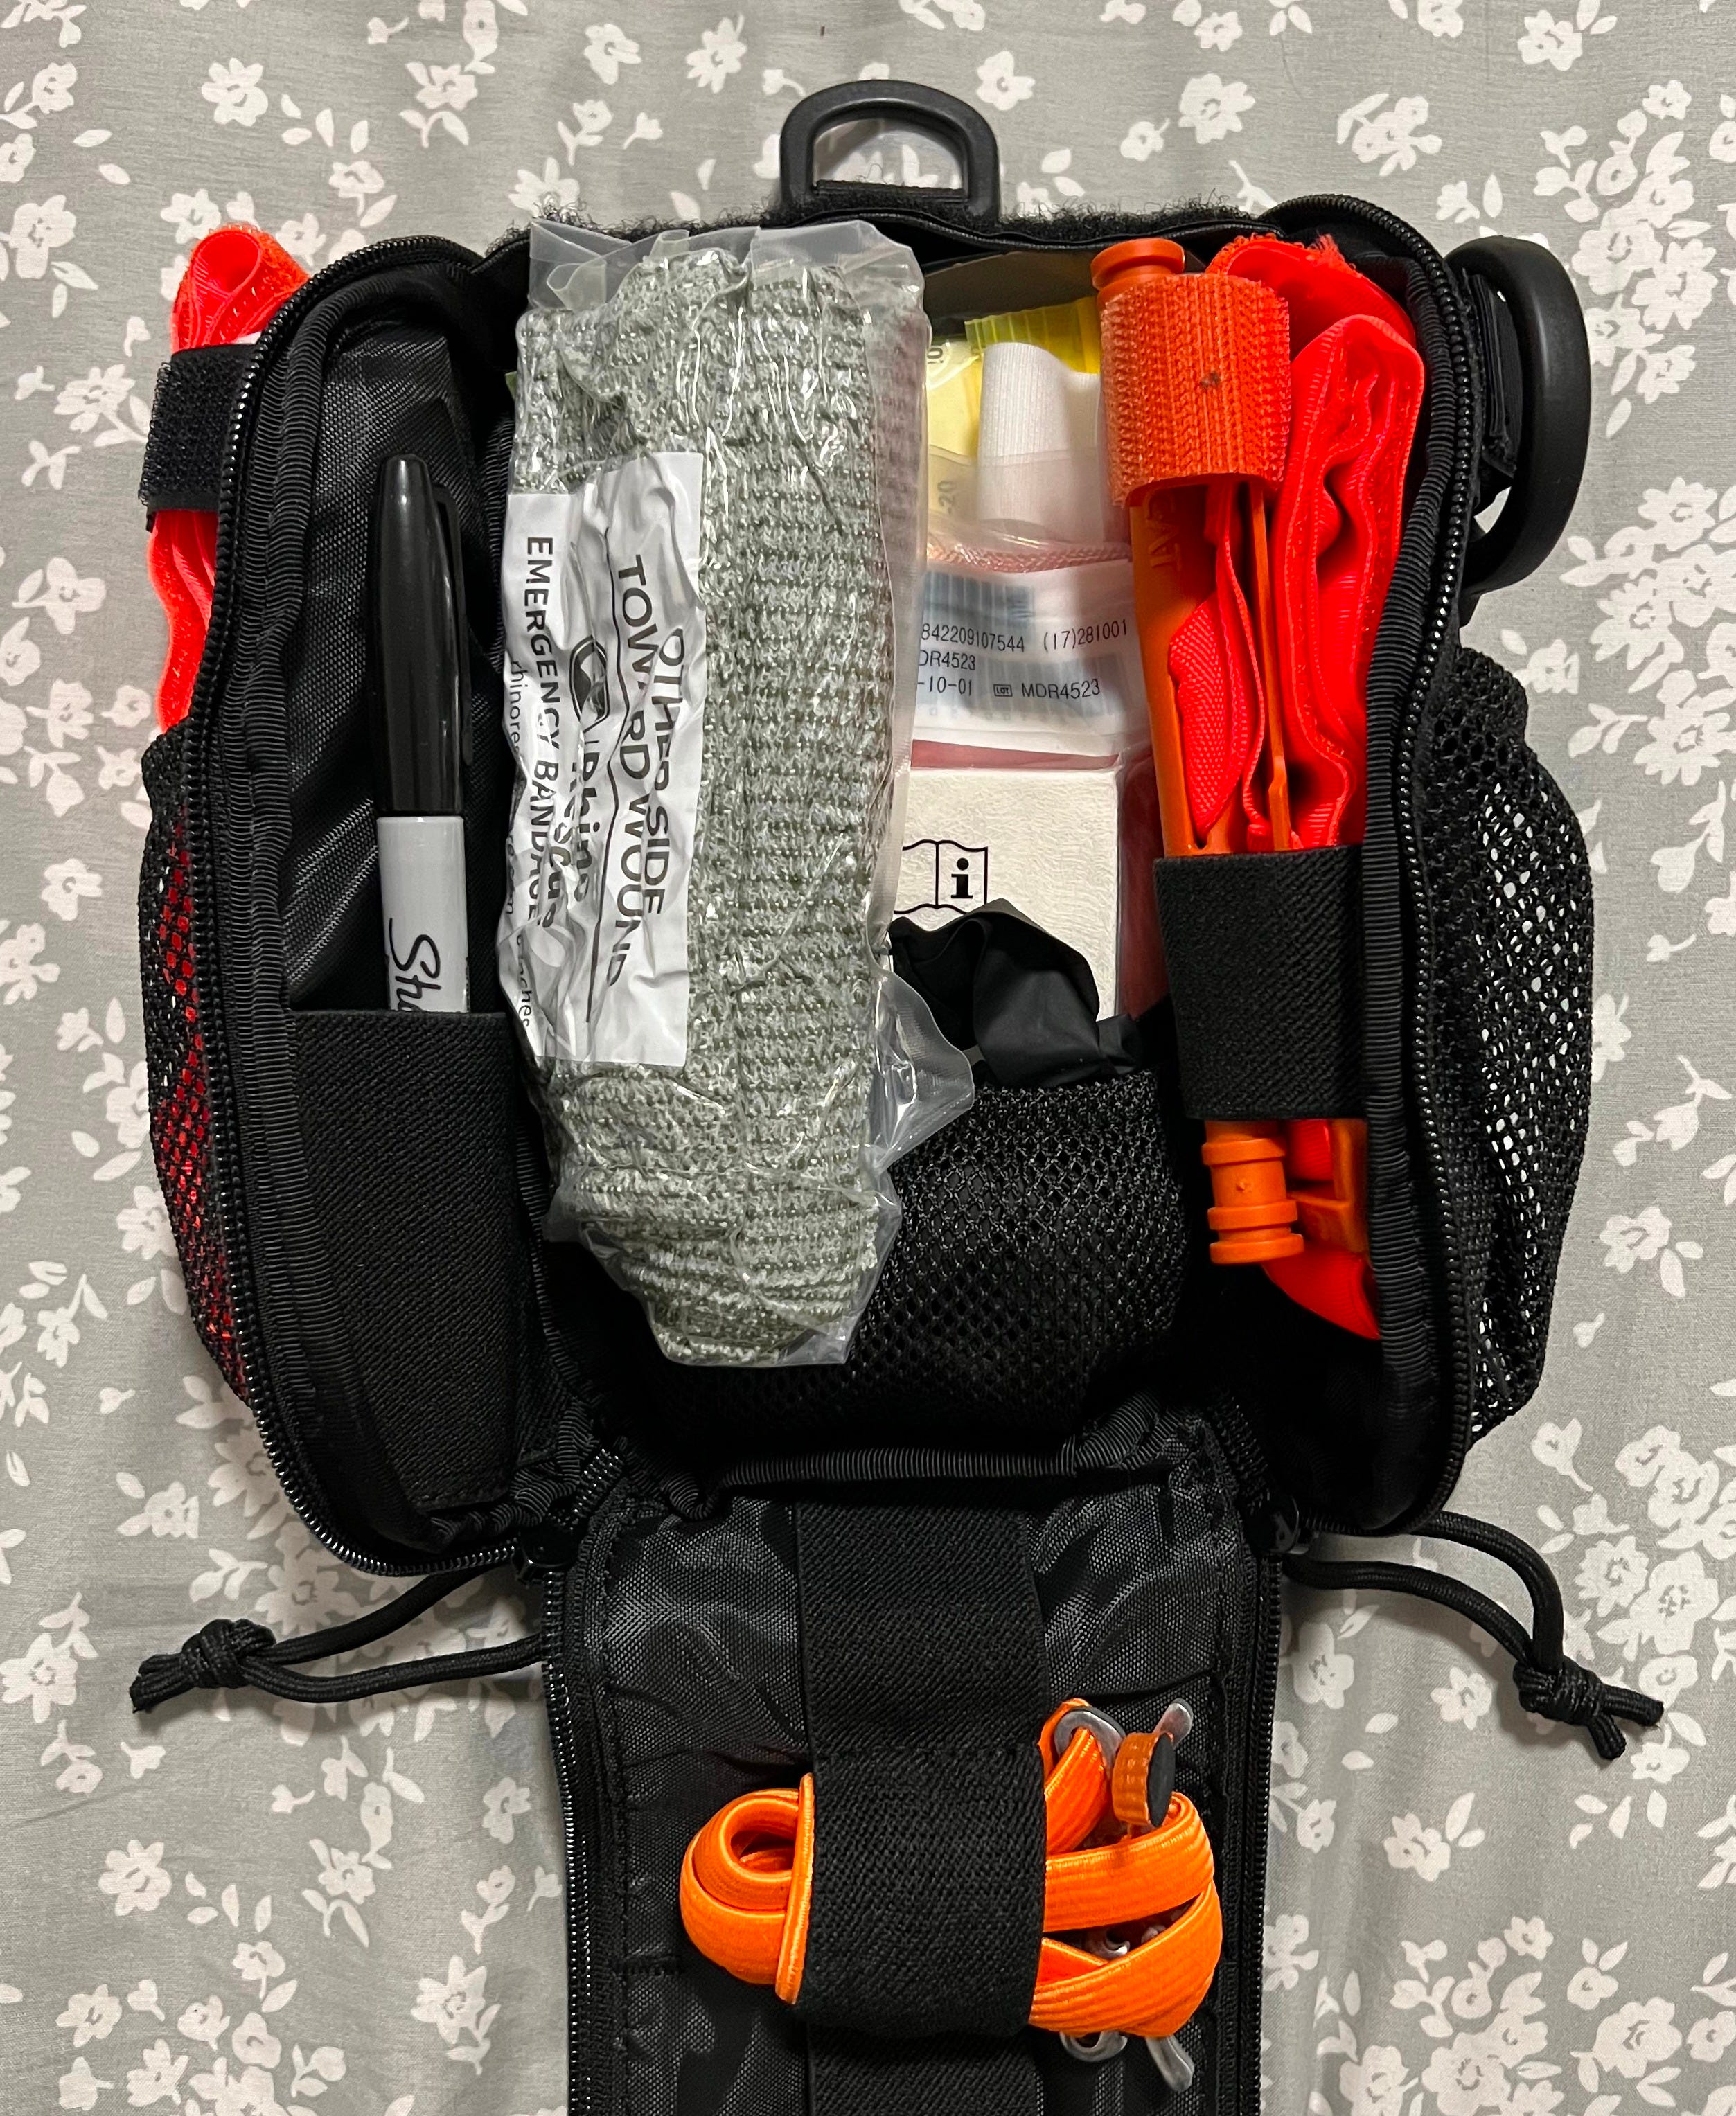
The supplies in your IFAK are specifically to deal with massive blood loss. This kit will contain:
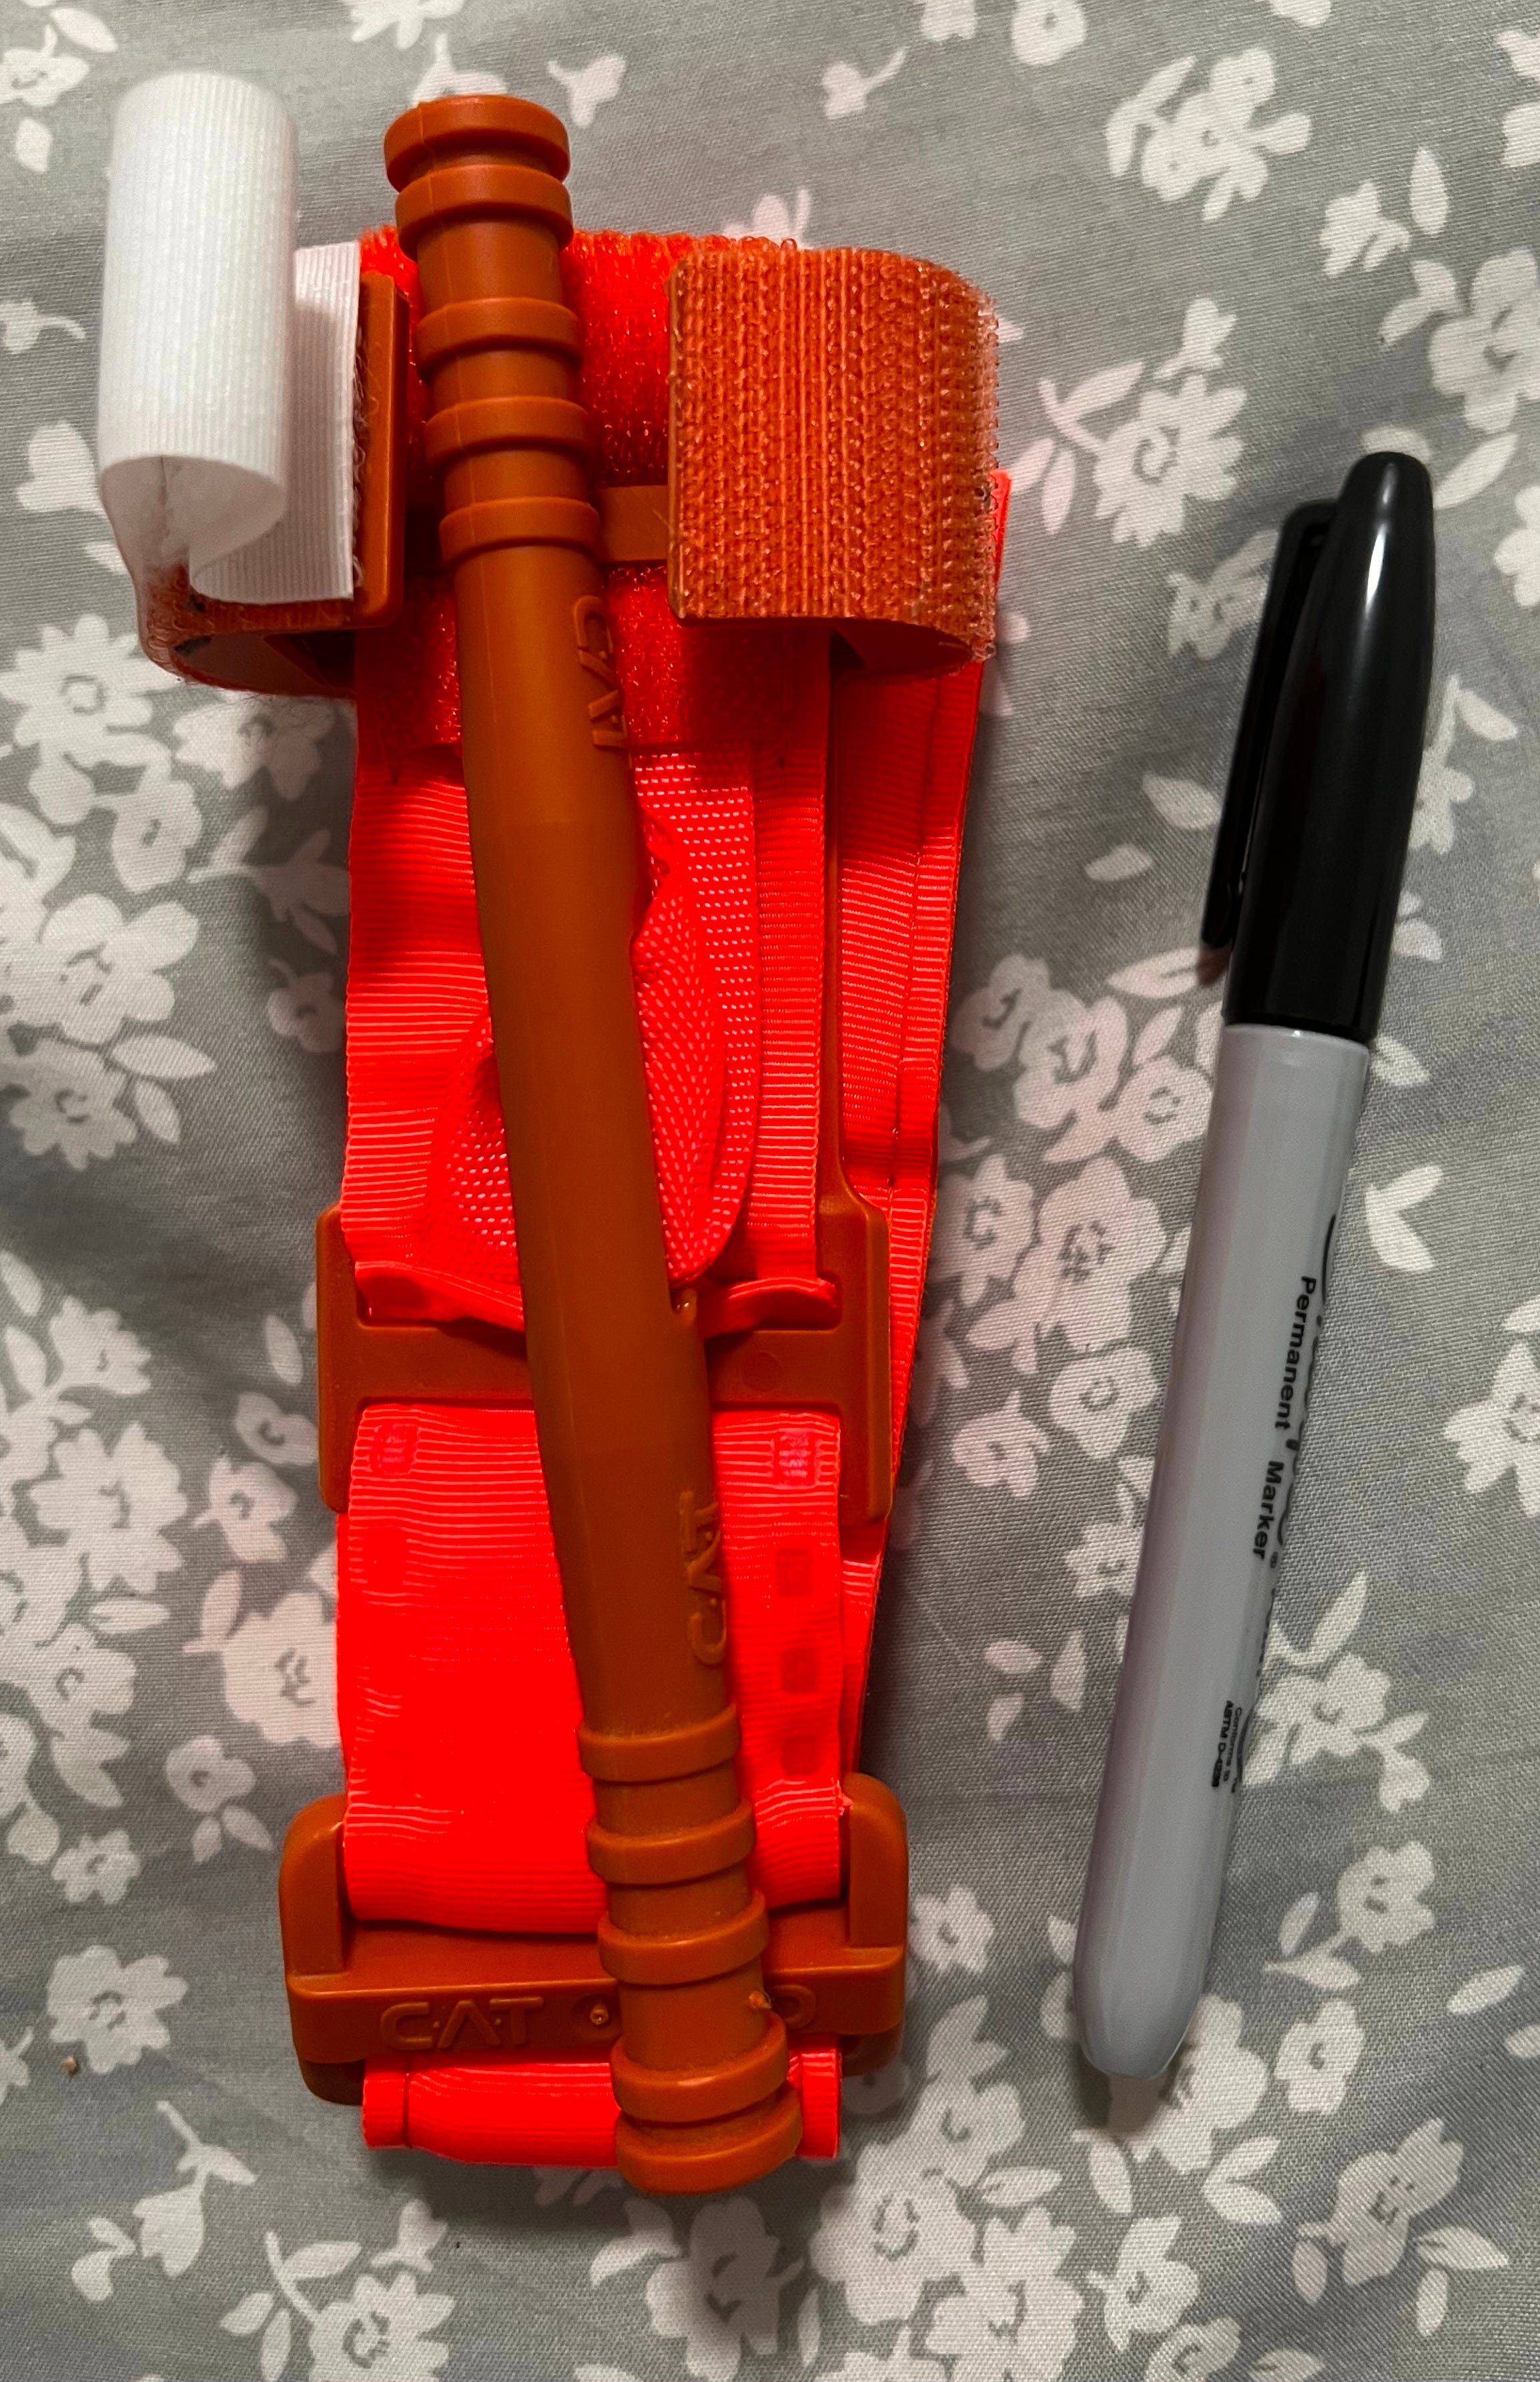
2 CAT Gen 7 tourniquets
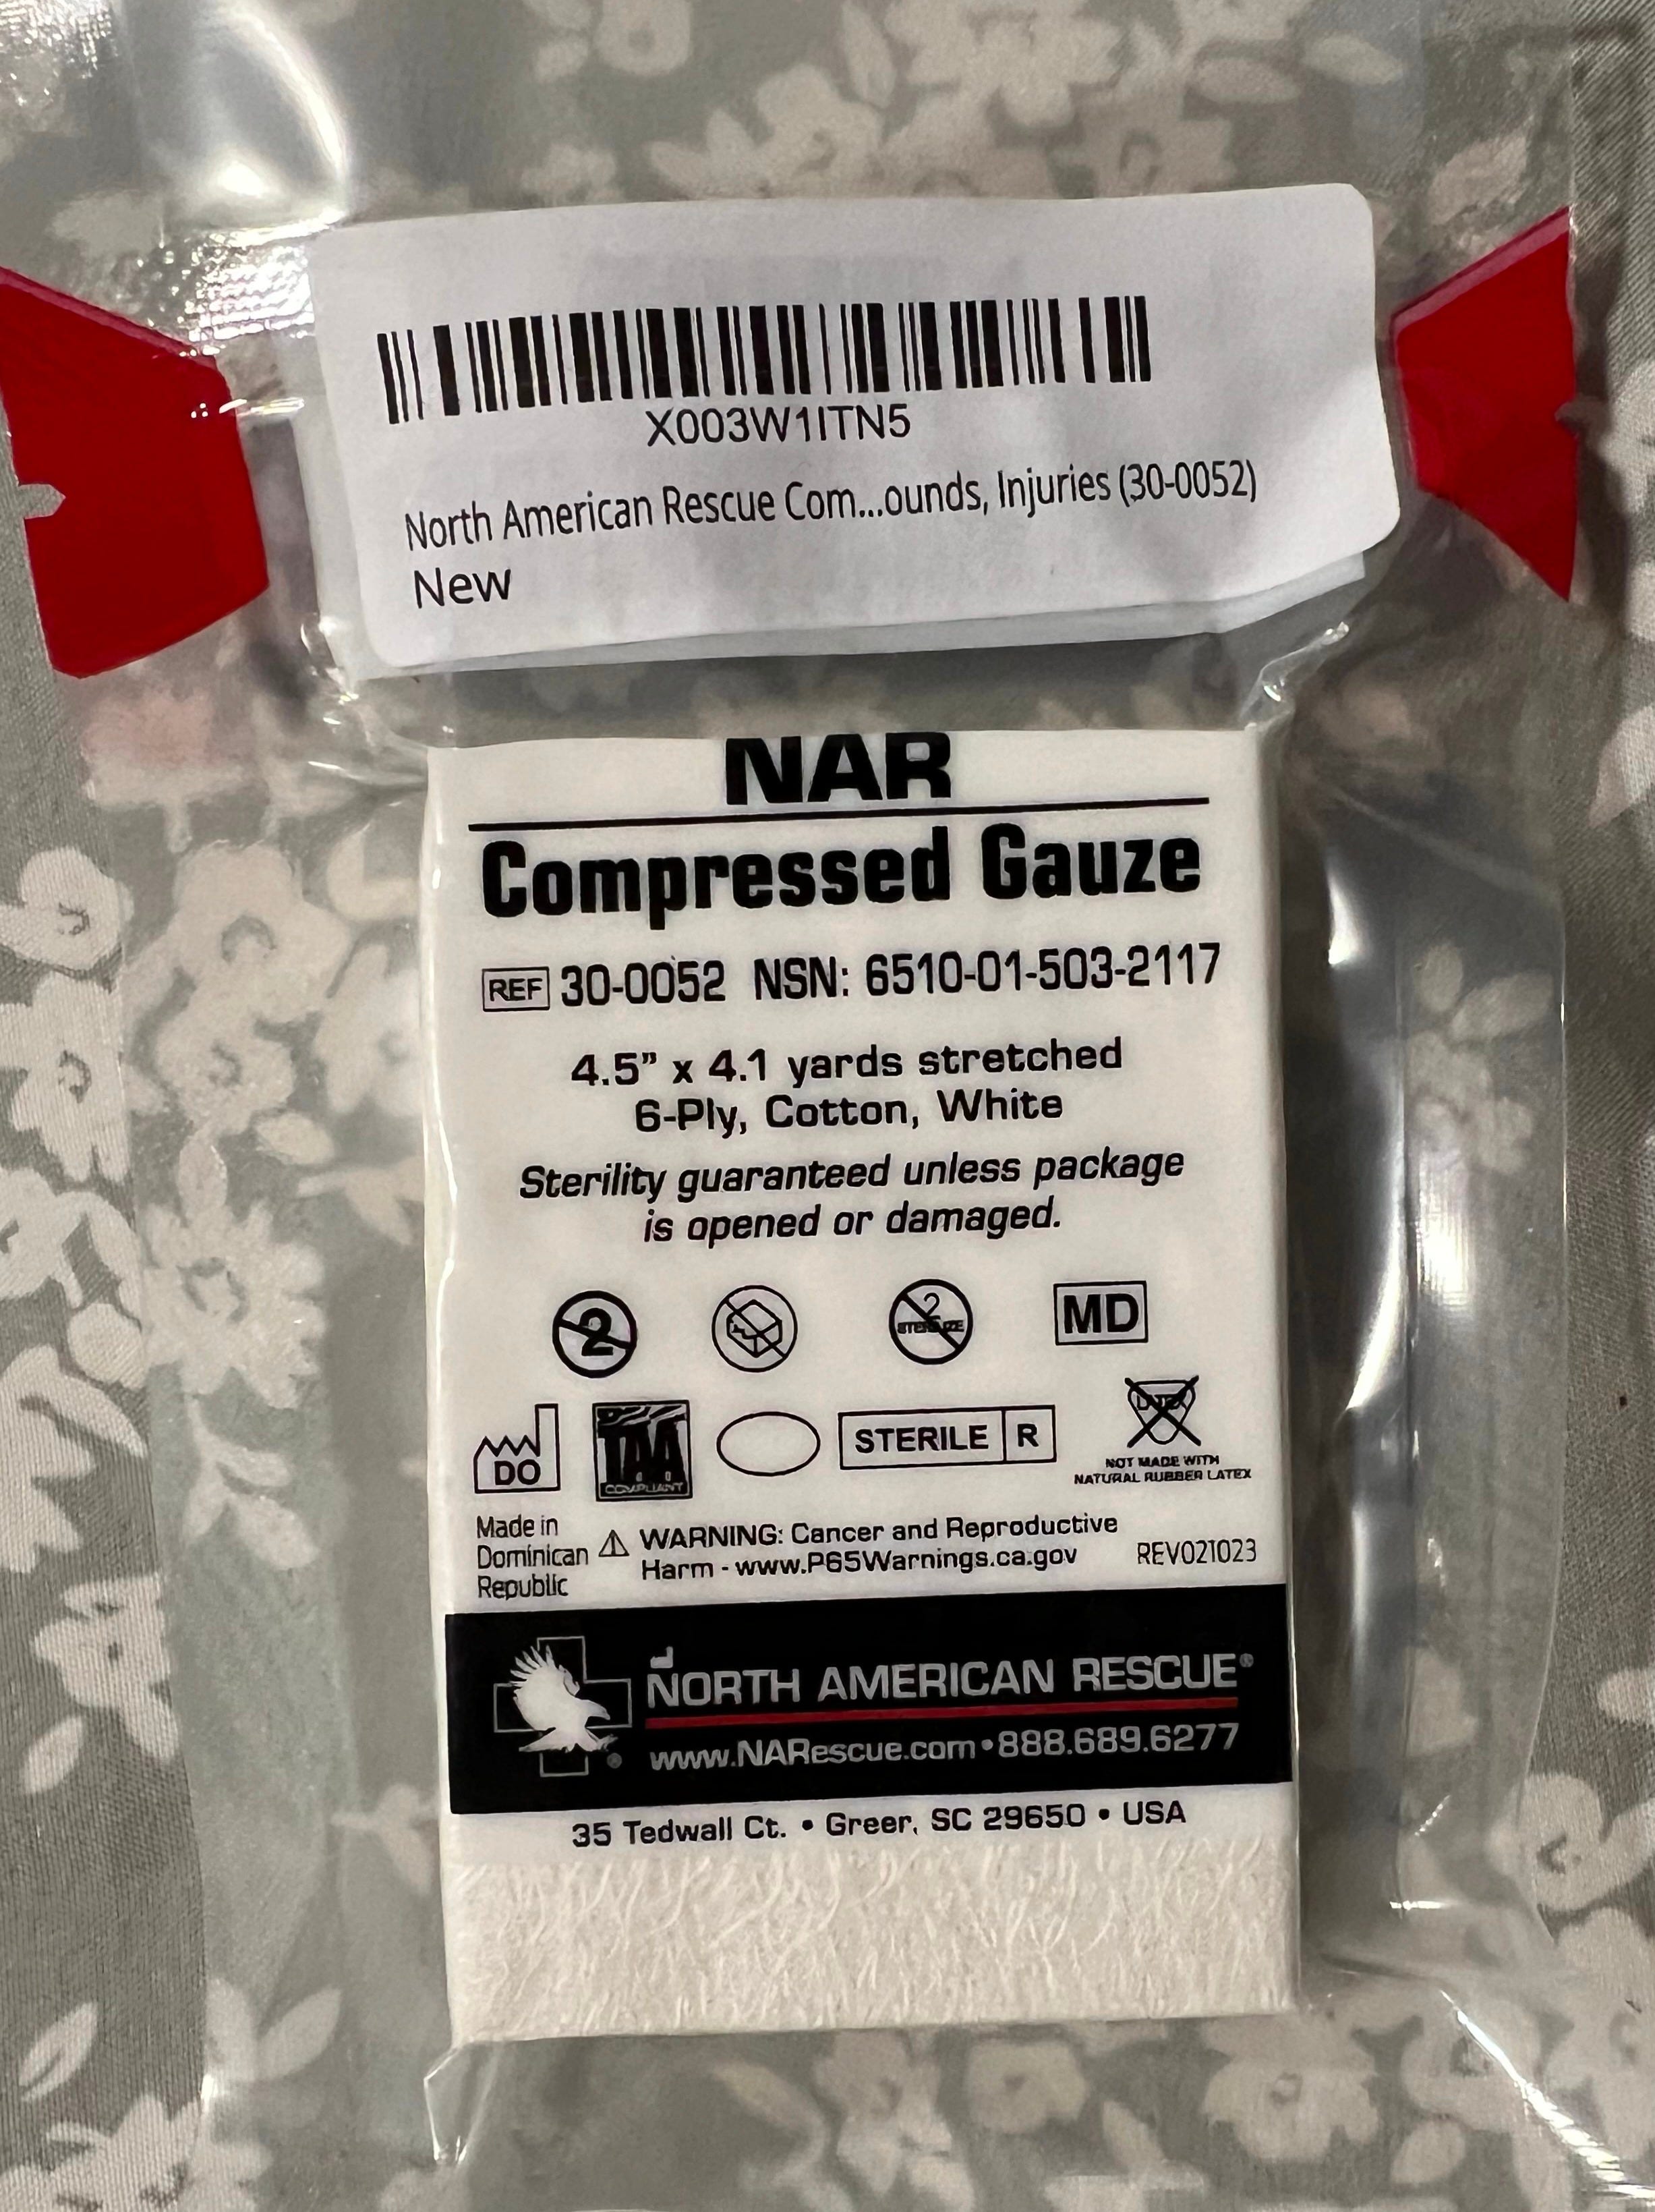
2 NAR compressed gauze packs
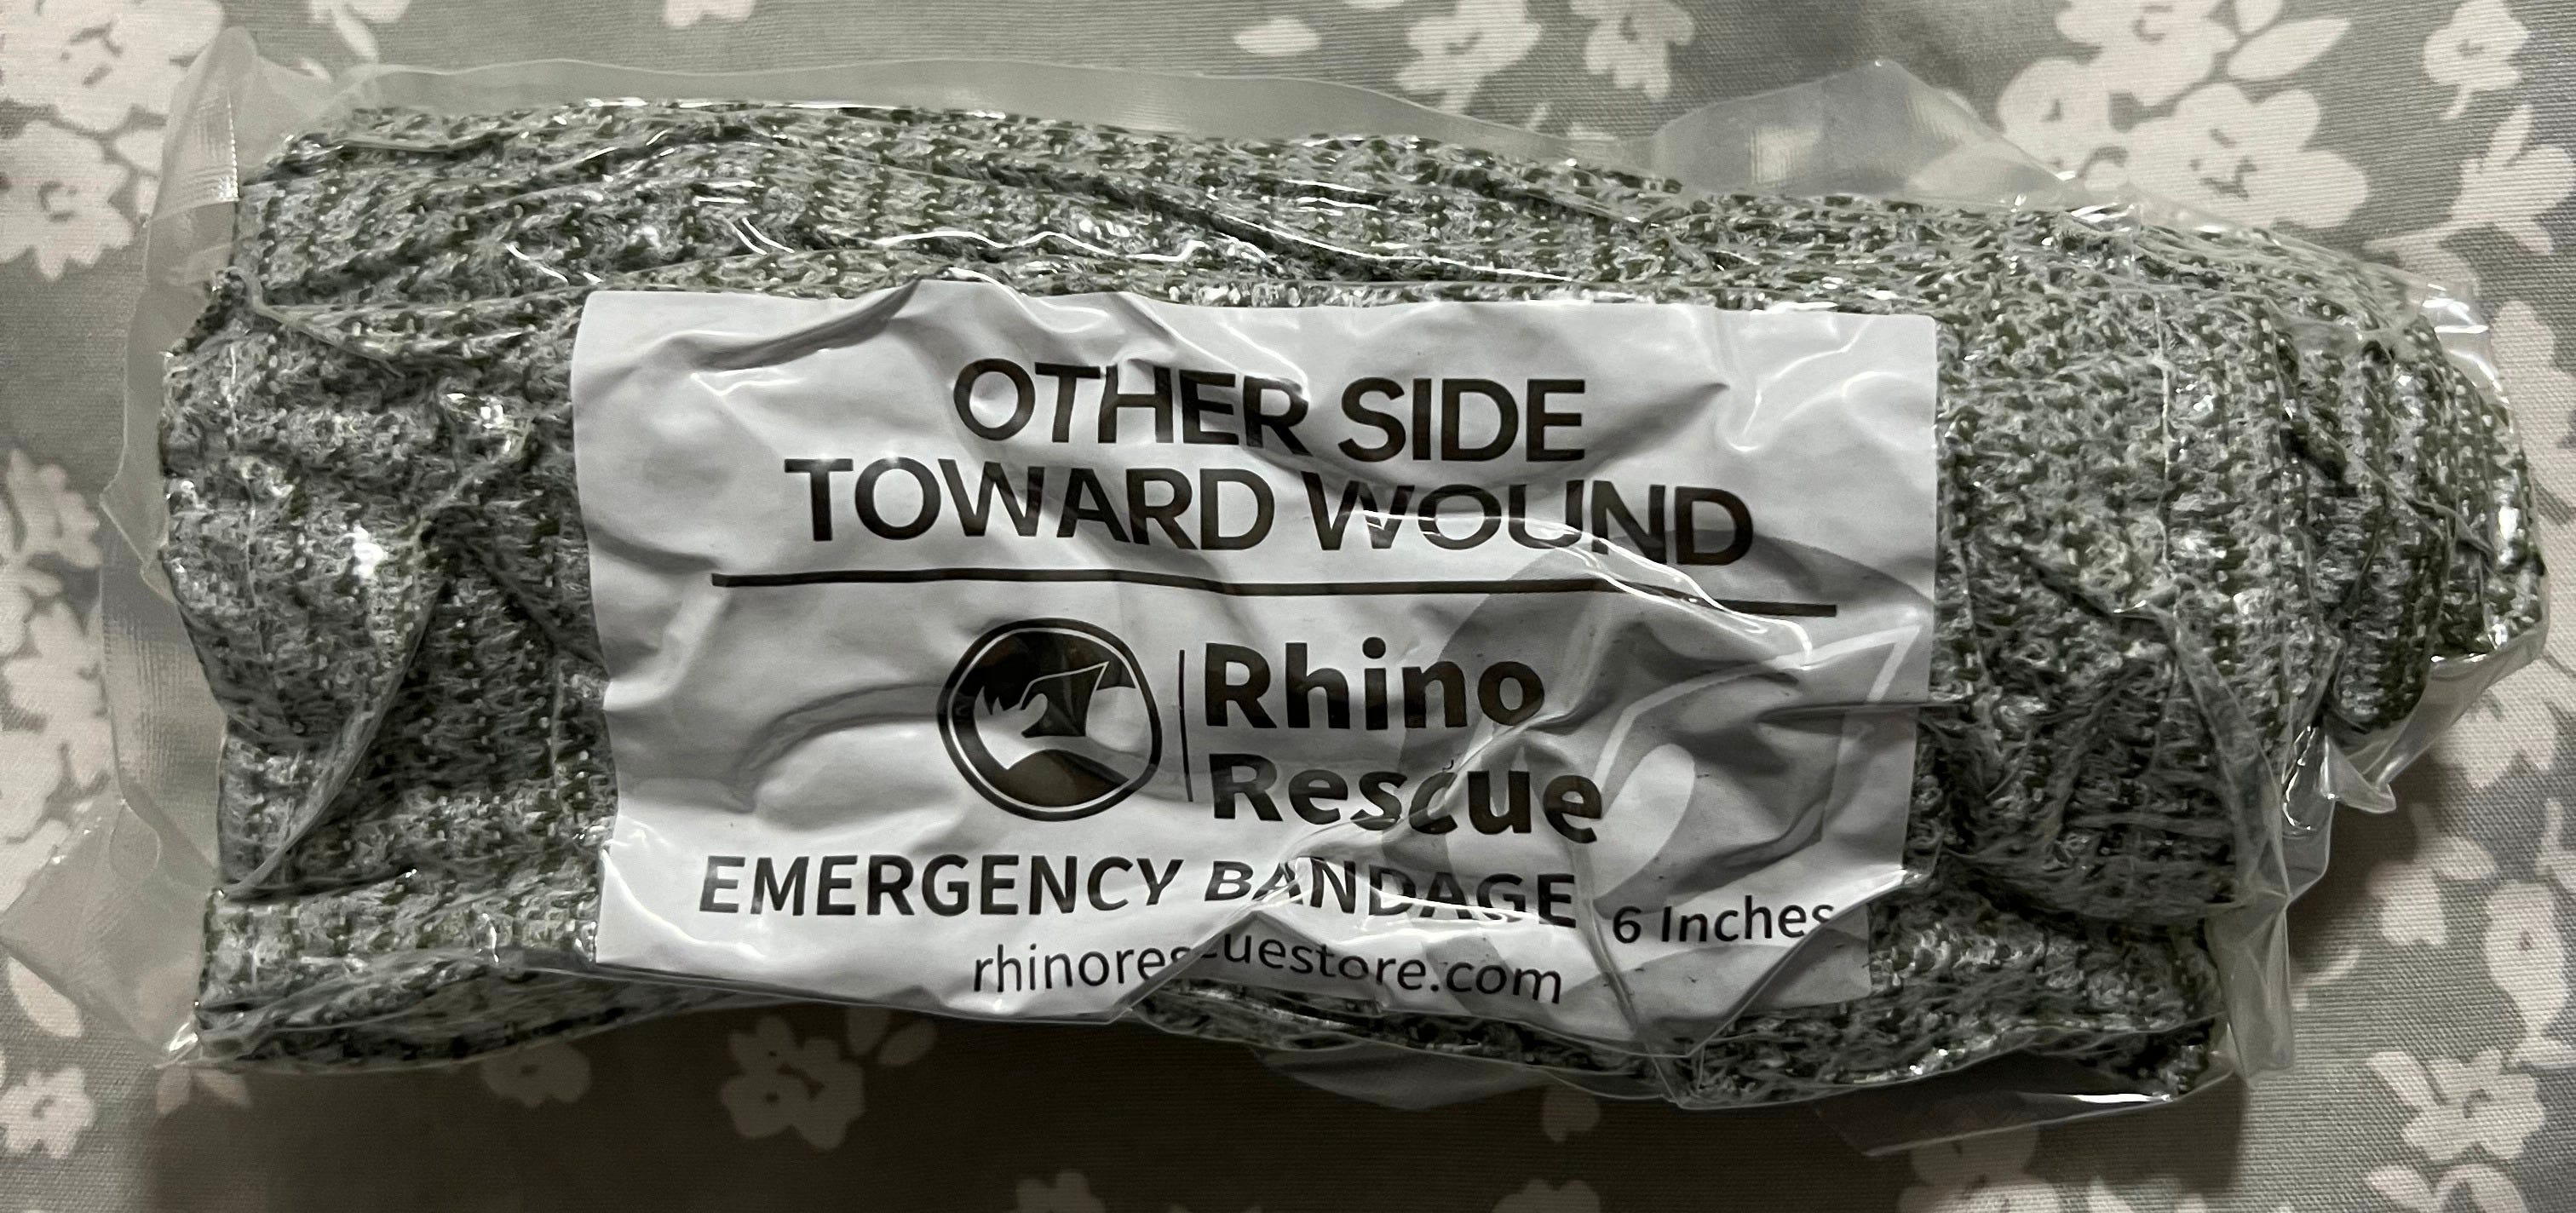
1 Israeli bandage
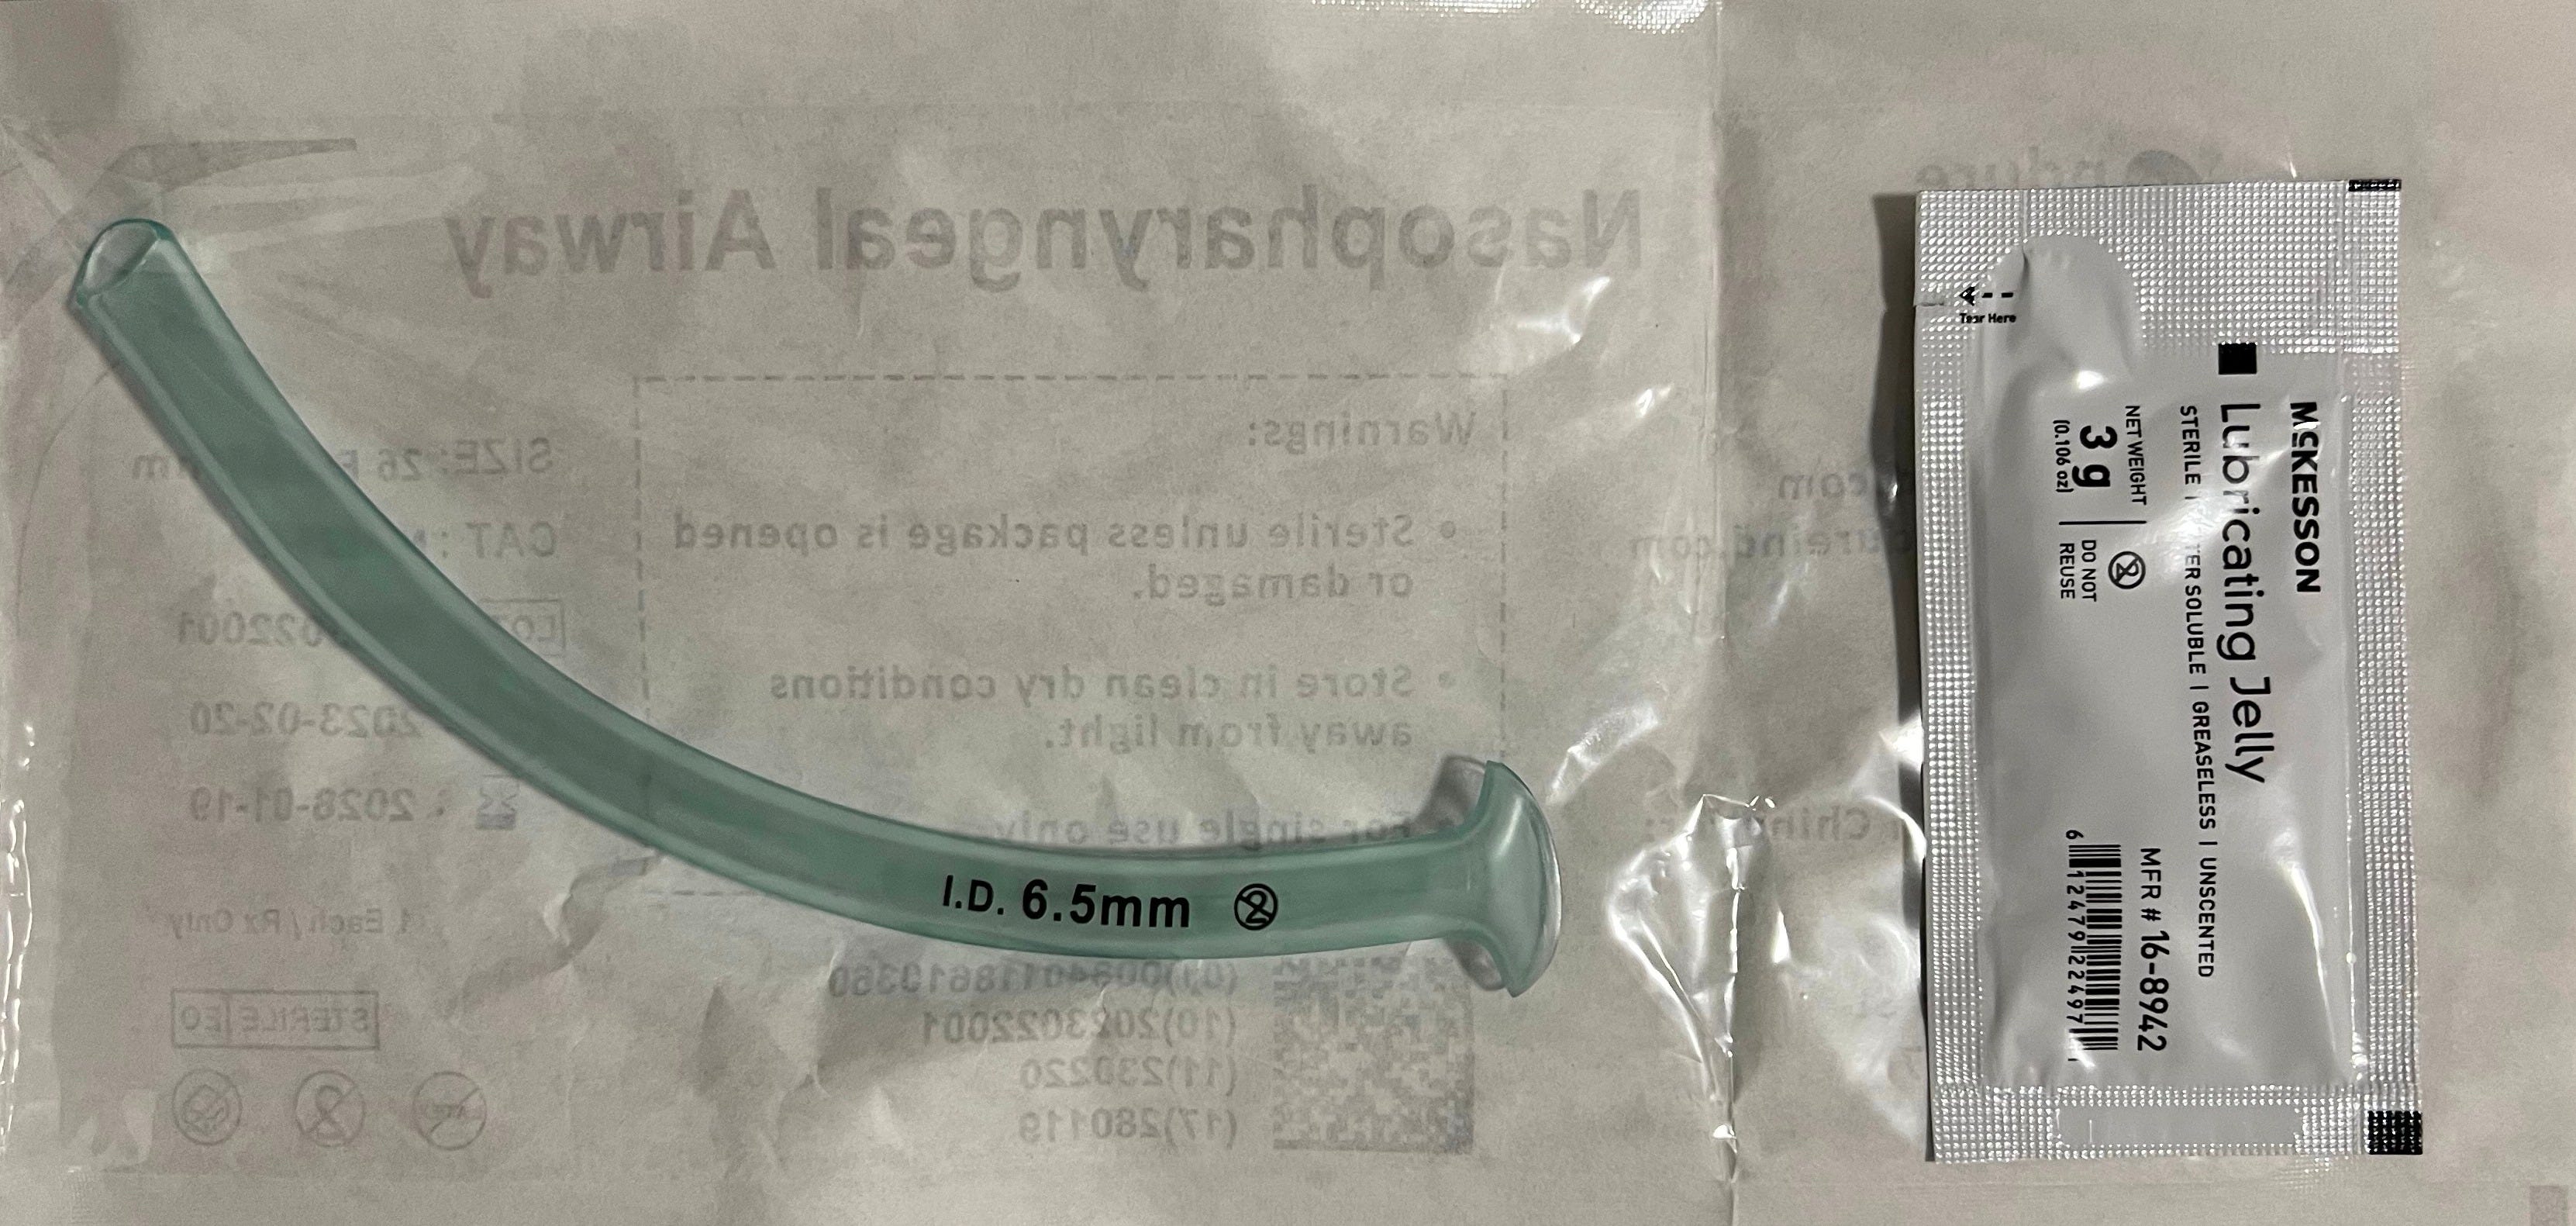
2 Nasopharyngeal airways (NPA)
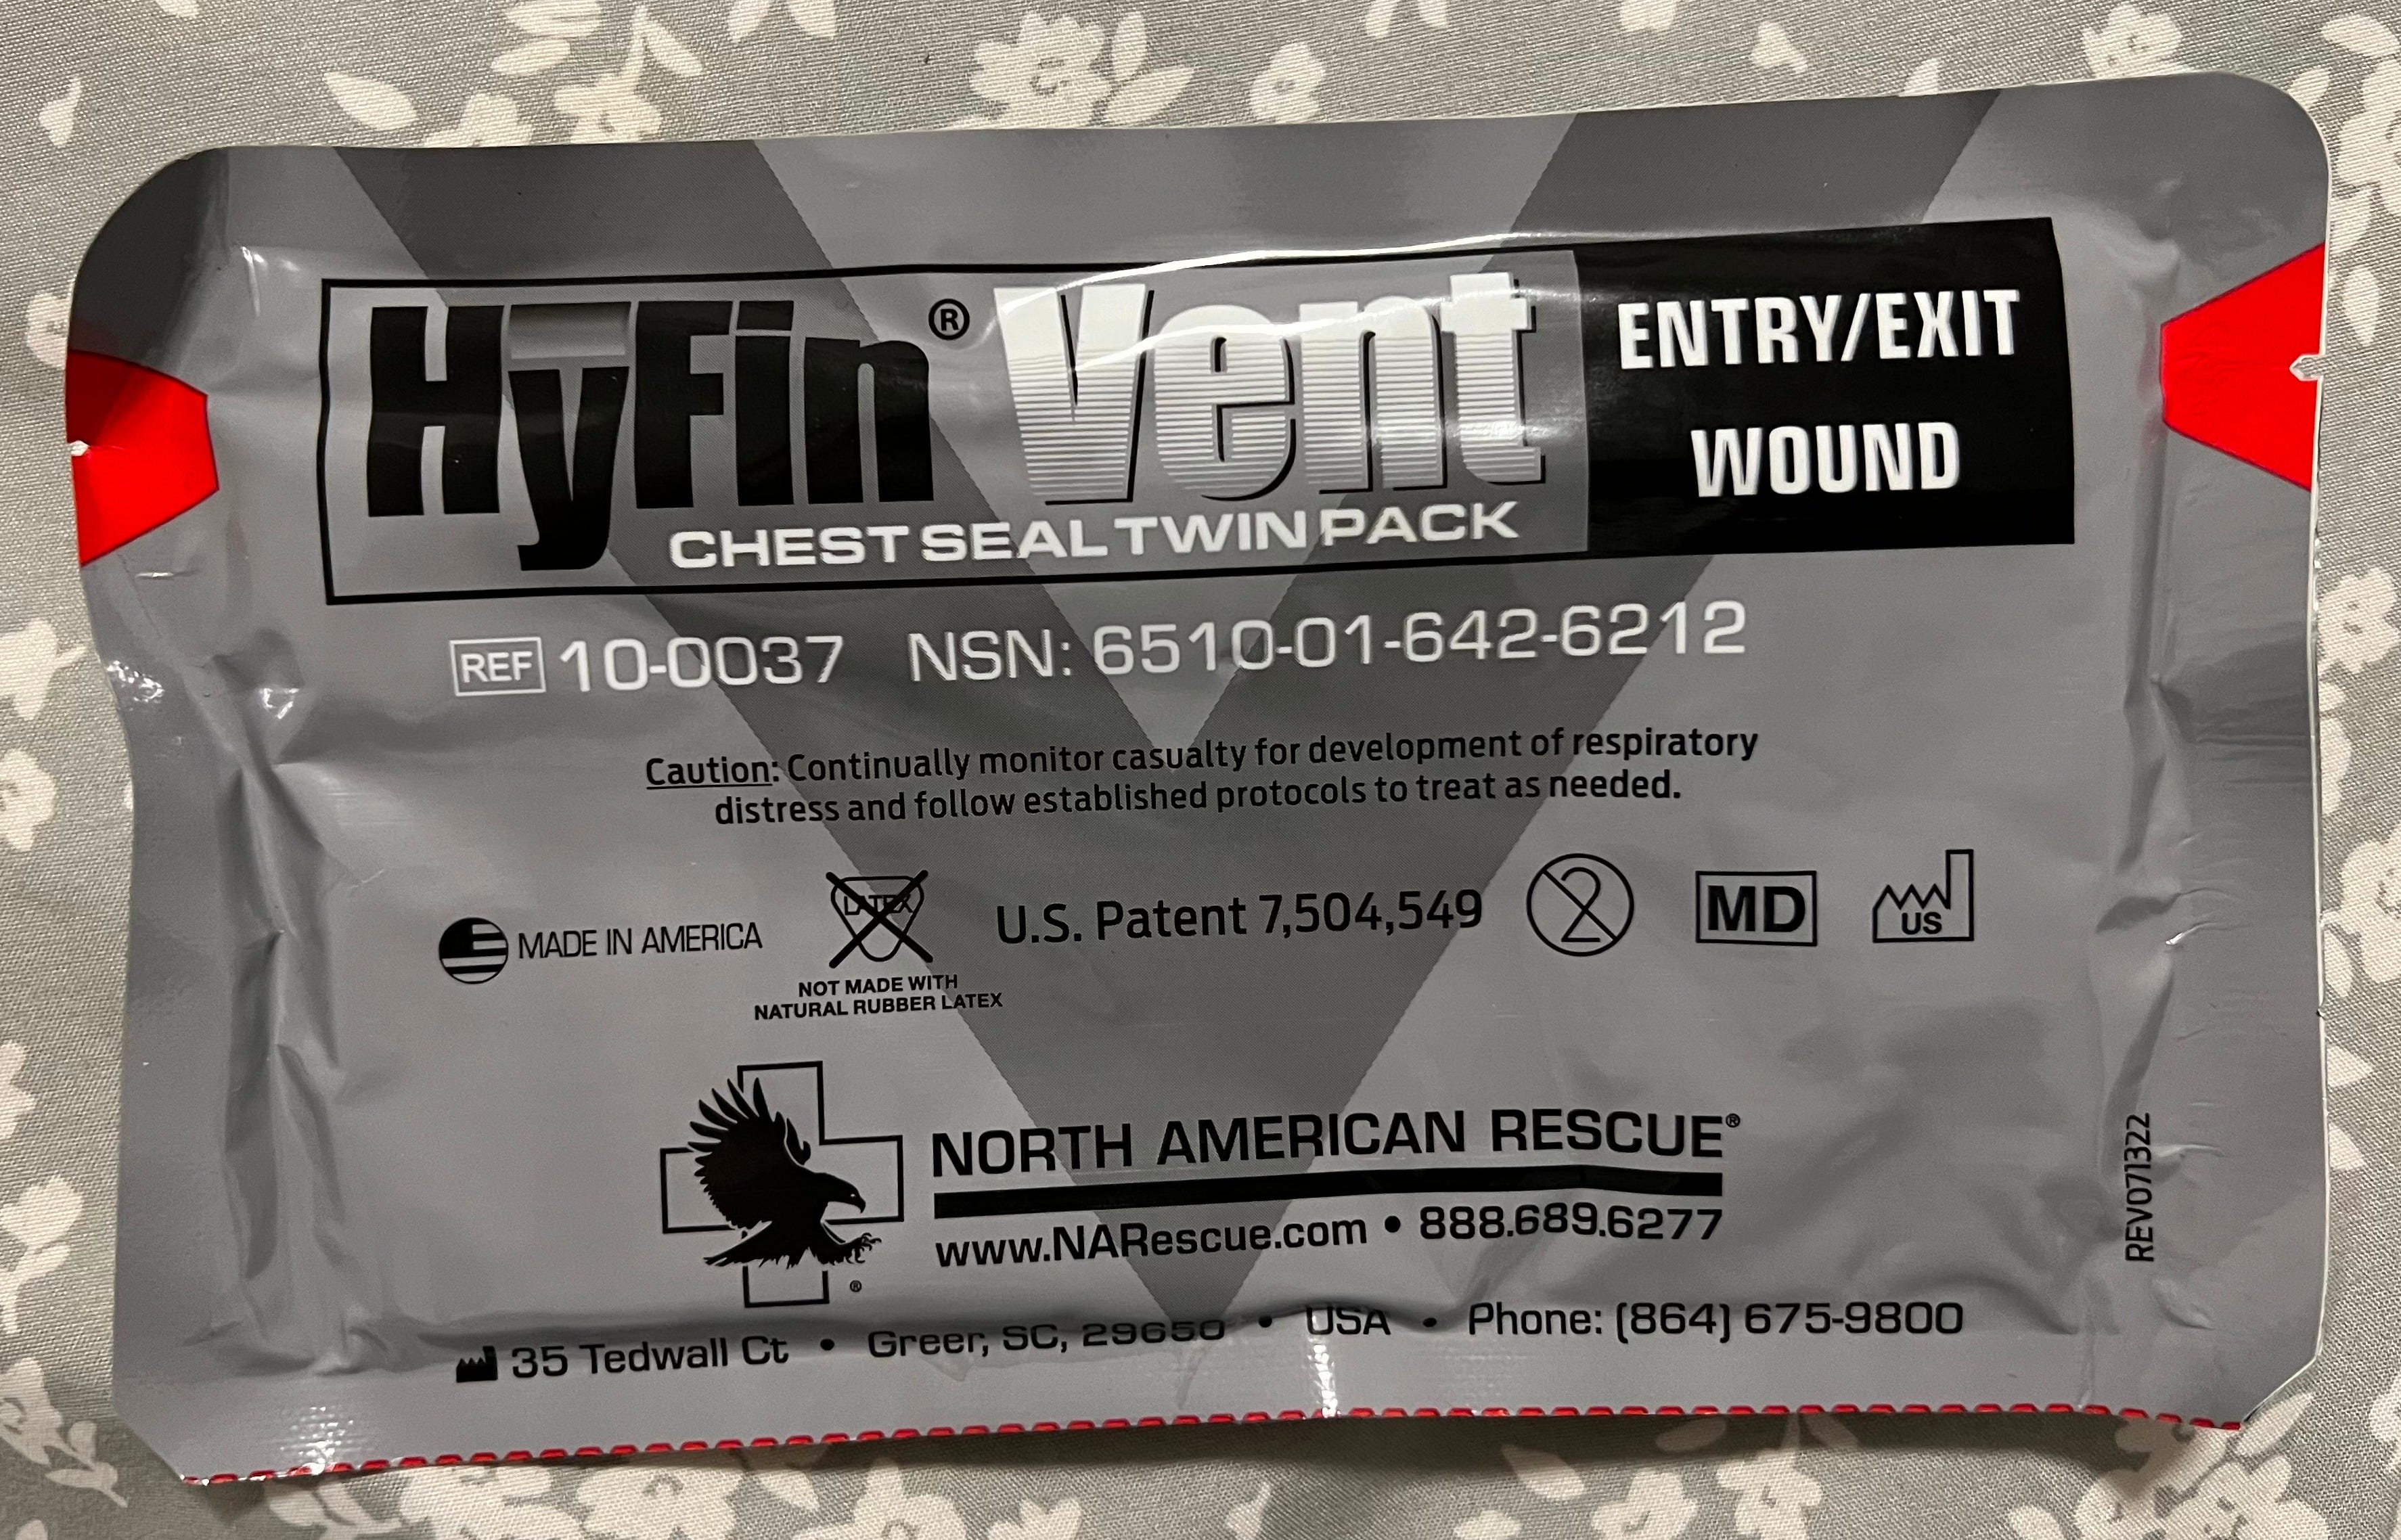
2 NAR vented chest seals
1 RATS tourniquet
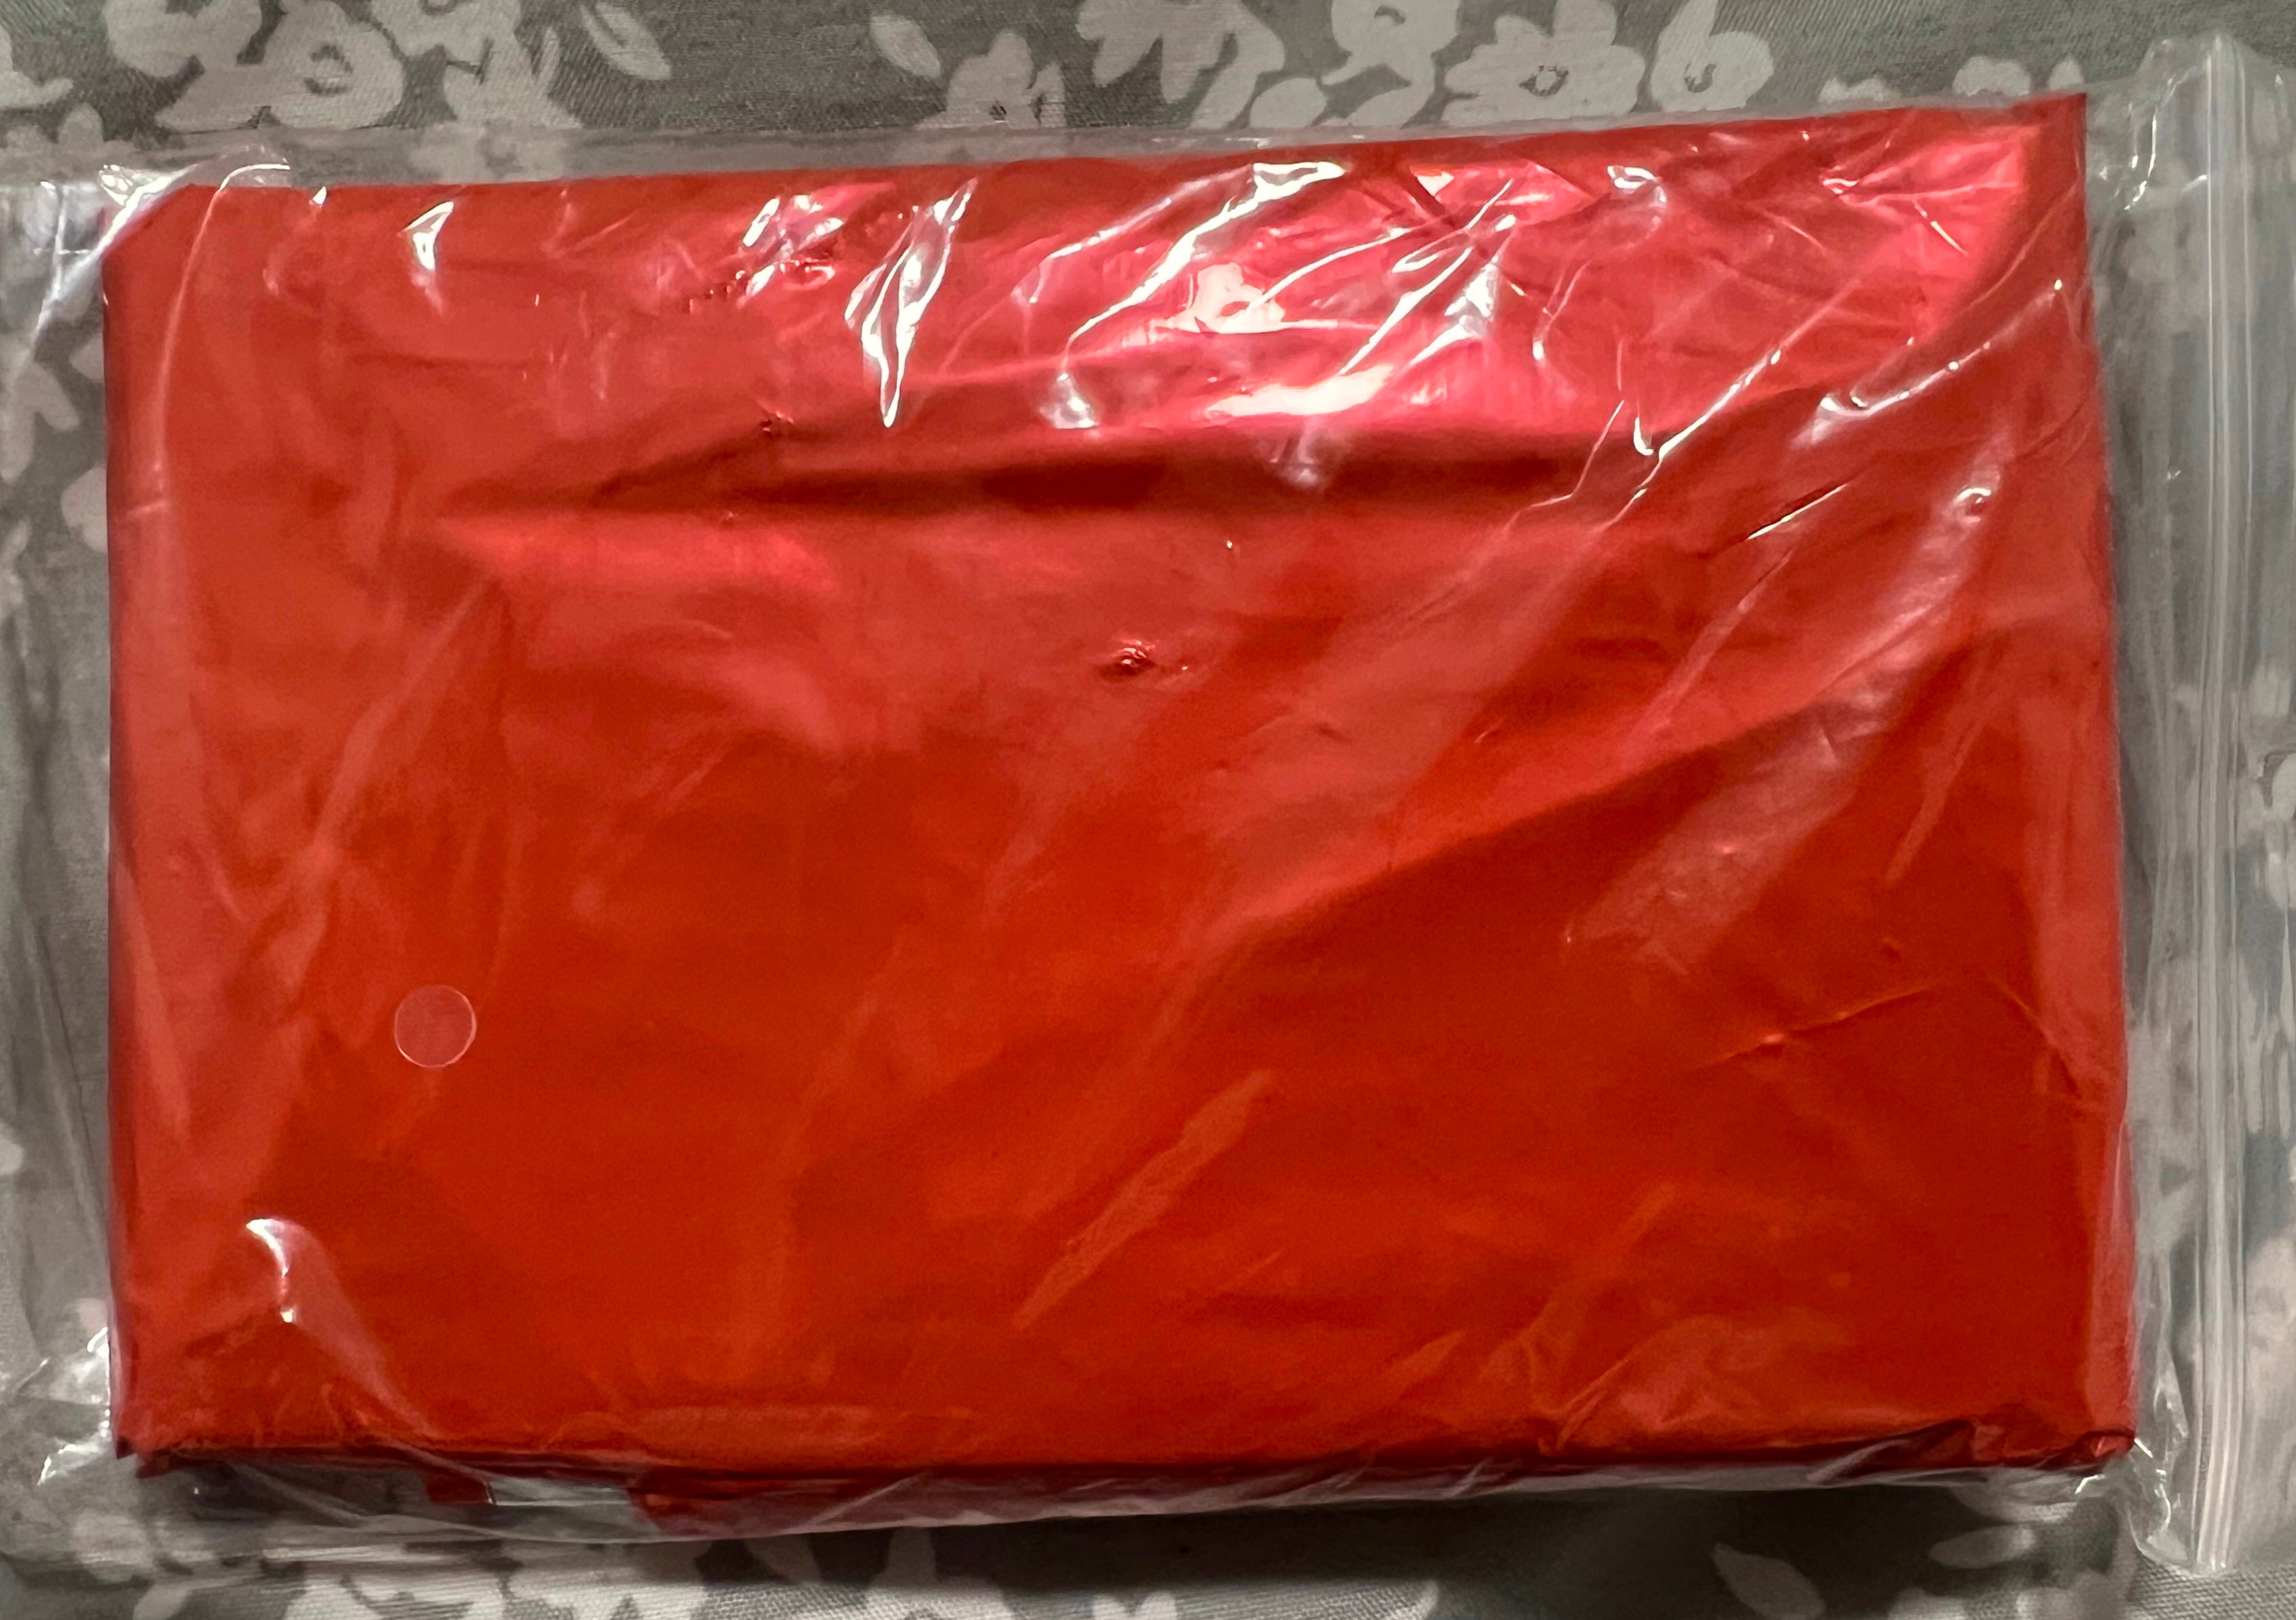
1 Mylar blanket
1 pair of trauma shears
1 Sharpie
3 pairs of rubber gloves
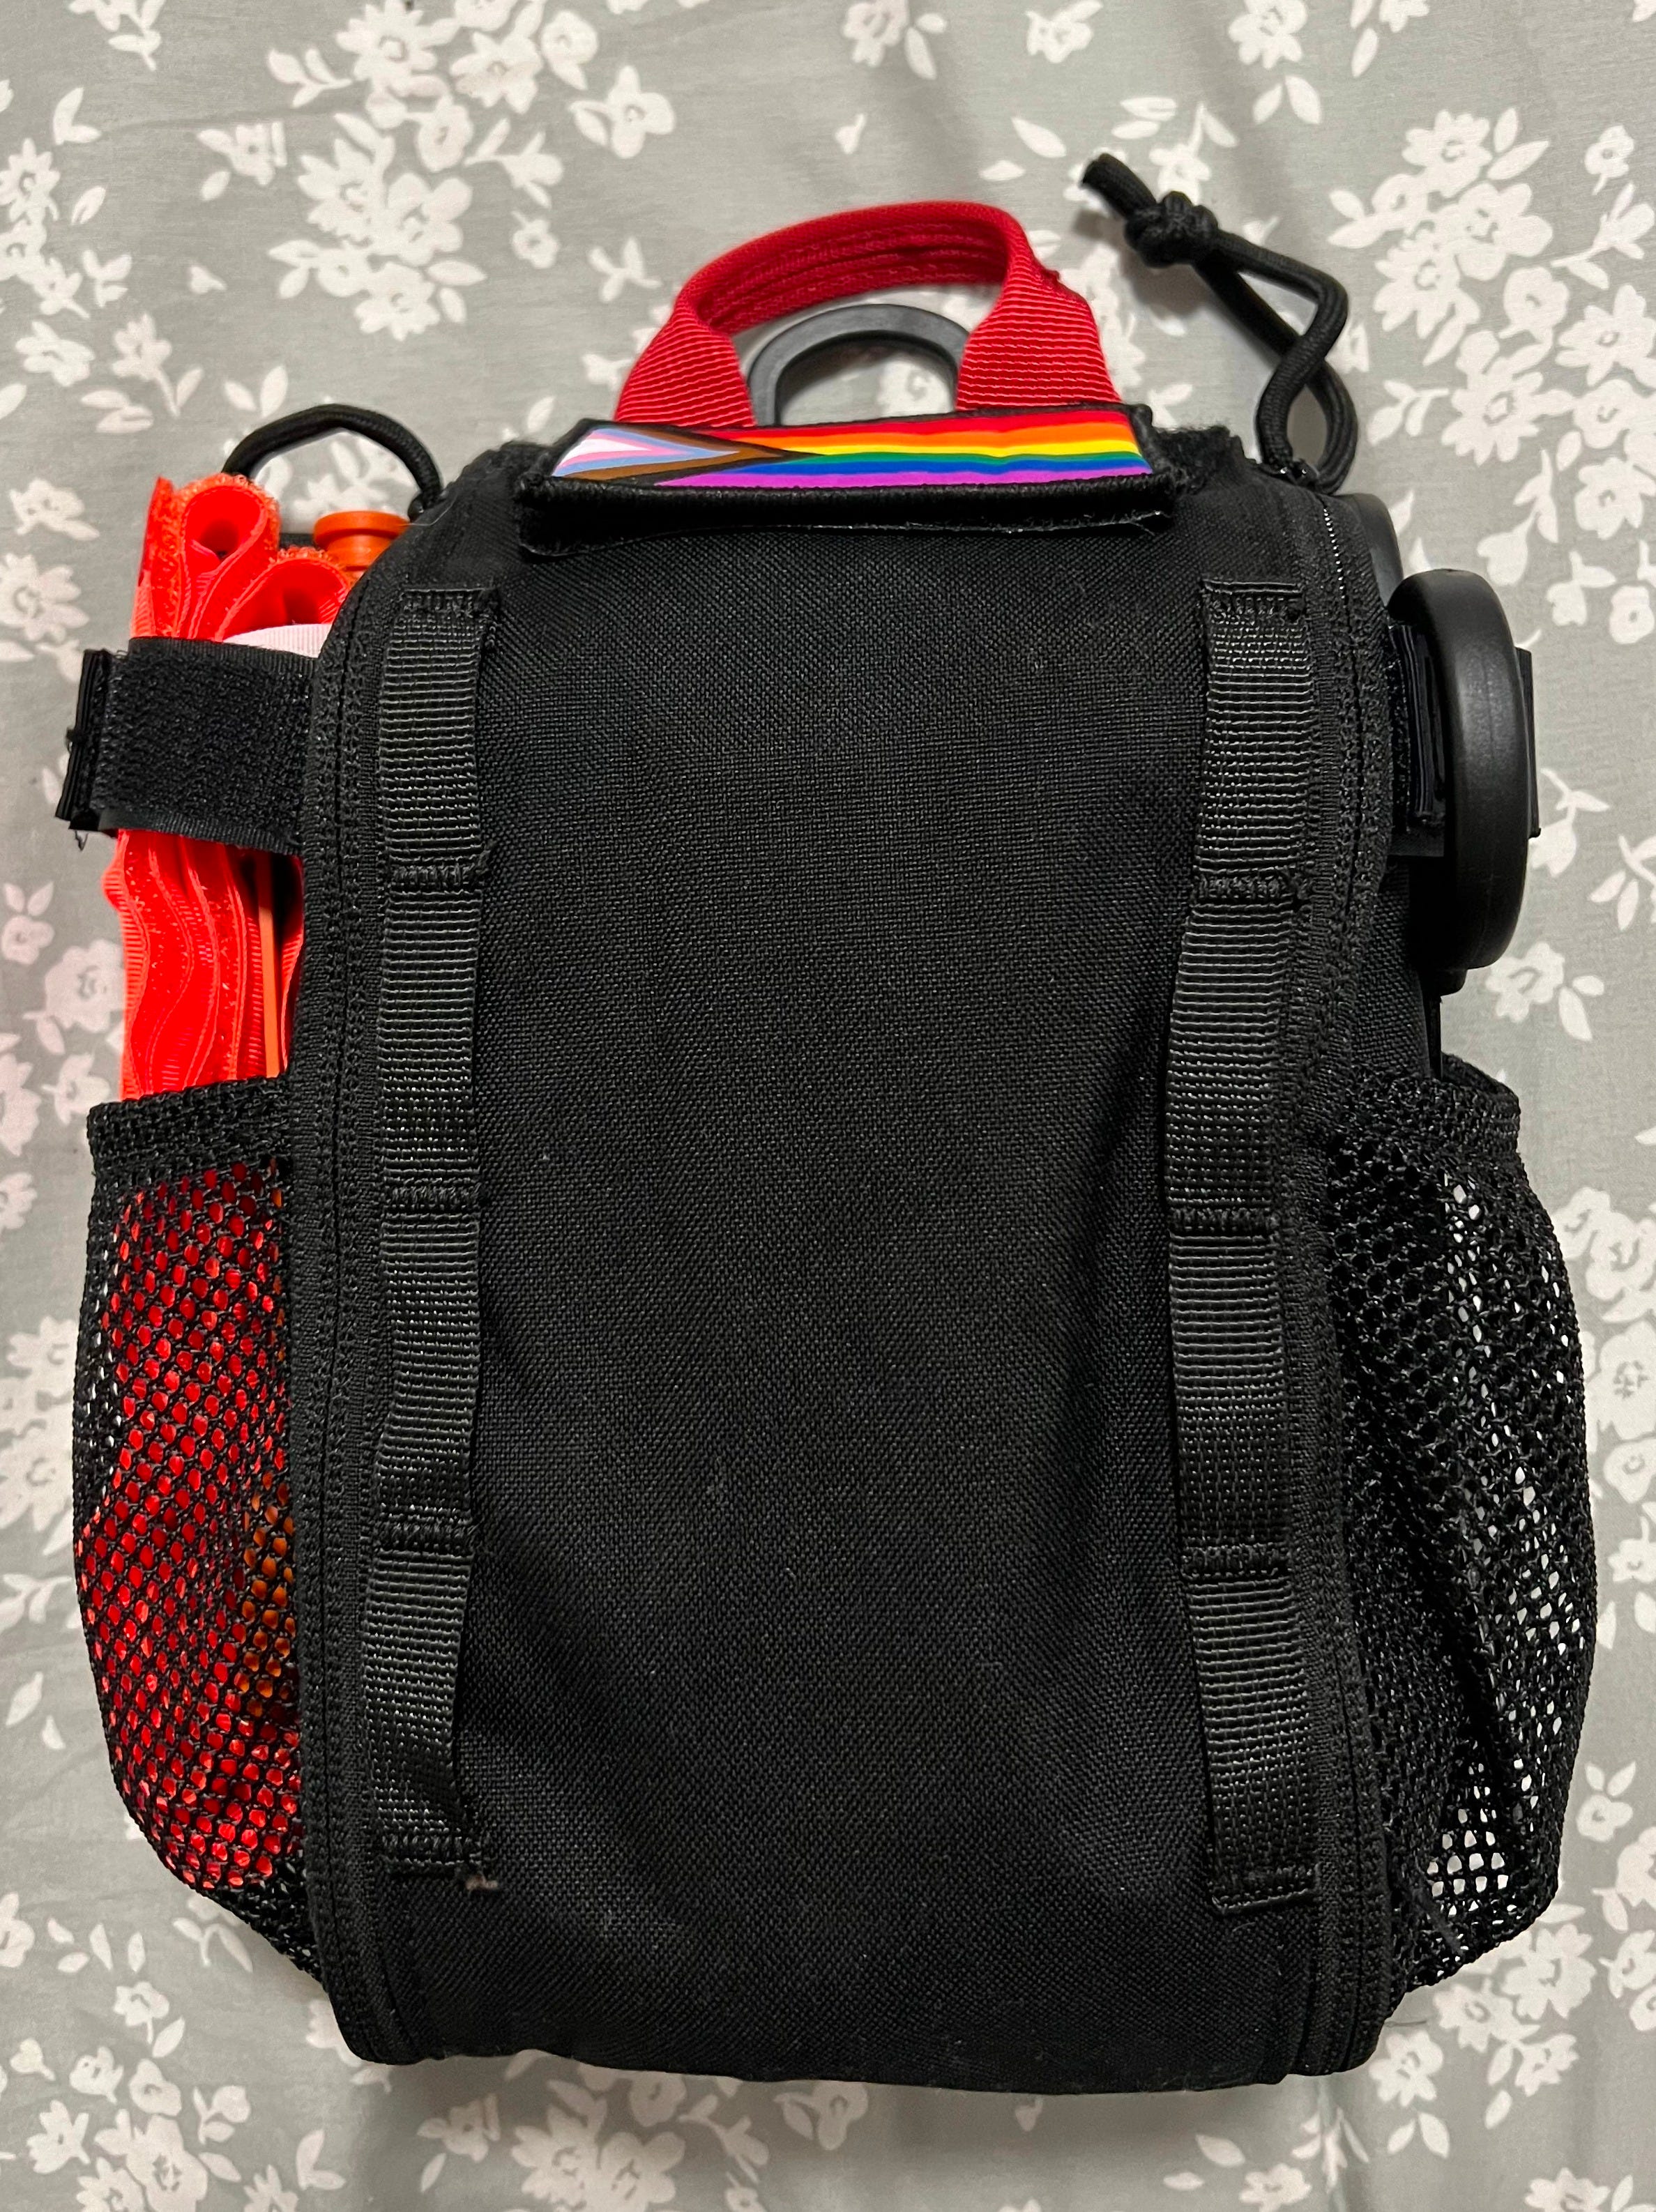
The Bag
An IFAK pouch is meant to be compact, portable, and opened quickly. They will have a red tab, the universal language of “this is a first aid kit,” and a pair of zippers that tear open easily. You can carry supplies in anything—a backpack, a purse, even a vacuum seal bag—but make sure whatever you’re carrying is organized and accessible.
Rubber gloves
The very first thing you should do when addressing a casualty is glove up. Bloodborne diseases are serious, and gloves are the first line of defense; not just to protect you, but to protect the patient, and any others that you may be rendering aid to. You can’t carry too many of these.
Notes on gloves:
Use nitrile, never latex! You may be knuckle deep in a bullet hole and you don’t want to add an allergic reaction to the list of problems.
Wear a bright color like blue or white so you can see blood. The quickest way to find a wound that’s not readily visible is to feel around and check your gloves. Colors like dark blue or black will make this difficult, and seconds are precious.
ALWAYS change gloves between patients to avoid cross contamination, and don’t touch your face while you’re wearing them. Have a bystander wipe your eyes & face for you if you’re sweating.
Trauma shears
These are to quickly cut through clothing. You need full access to the wound to properly treat it, and this is the fastest way to get that. You can spend a lot of money on a good pair of shears and frankly if you’re going to use them a lot I think that’s a good idea, but just have something. I keep these stowed in the outside pocket of my bag so I can get to them immediately.
Cutting someone’s clothes off is going to add tremendously to an already high-stress situation, so talk to your patient and get their verbal consent to do so. This doctrine applies to every aspect of care, but particularly something as invasive and stressful as cutting someone’s pants off with scissors after they just got shot.
Tourniquets
This is the most important piece of gear in your kit, reflected by its storage on the outside of the bag; it is likely the first thing you’ll be reaching for. I recommend you carry four tourniquets total on your person, with at least three in your IFAK. In my kit proper, I carry 2 CAT Gen 7 tourniquets and 1 RATS tourniquet. CATs are the gold standard, carried by military and first responders, and I recommend you carry these for two reasons:
They’re definitively the most battle-tested (literally) tourniquet on the market, and
Should you get fucked up and need a TQ applied to you, carrying a CAT makes it as likely as possible that someone else will be familiar with how to use it.
The basics of applying a CAT are best understood visually but they’re straightforward: slide it over the limb to at least two inches above the wound (and never over a joint) in case the blood vessel has severed and retracted into the body; pull all the slack out and secure the end of the strap to the velcro; twist the windlass as tight as necessary until the bleeding stops, which you will confirm by watching the wound; and finally secure the windlass onto the plastic hardware attached, and write the time of application on the white tab with your sharpie.
RATS tourniquets follow the same principles but are applied differently: the cordage is looped back on itself and then cinched down, followed by multiple tight wraps until the bleeding stops, then finally securing the end in the attached metal hardware.
Notes on tourniquets:
Your patient will be screaming bloody murder during this process. Tourniquets hurt. By the time it’s tight enough you shouldn’t even feel a pulse in the limb, and that level of pain is difficult to describe. It is critical that you talk your patient through it.
DO NOT remove a tourniquet after it’s been applied. That’s the surgeon’s job, and they get paid a lot to know the right way to do it.
DO NOT buy off-brand knock offs to save money. There are a lot of good counterfeits out there and you don’t want that windlass snapping off when you need it.
DO NOT forgo carrying a real tourniquet with the assumption that you will “improvise” one. That’s a myth and it won’t work, and the memory of trying and failing to get that belt tight enough while somebody bleeds out under you will haunt you for the rest of your life.
Packing gauze
This is the second most important piece of gear in your kit. You literally cannot carry too much of this stuff. While hemostatic gauze is considered the gold standard for field medicine, regular gauze is fine as long as you apply it correctly and with enough pressure.
Wound packing is done when hemorrhaging is occurring at a junctional site: where a limb meets the body and a tourniquet can’t be applied (shoulders, neck, pelvis). I recommend everyone commit the sewing machine technique to muscle memory: after you’ve located the bleed with your finger, use one hand to feed gauze to the other which packs it tightly into the bleed, using at least one finger to maintain a shitload of pressure the whole time.
Notes on wound packing:
HOLD PRESSURE! As soon as you have the wound packed and bleeding controlled, use your entire bodyweight to keep it there, either with the heels of your palms or an elbow or knee if necessary. This gets tiring faster than you think, so have someone ready to take over for you if necessary.
If you have to move a patient, first secure the packed gauze with a compression bandage (discussed below).
Practice the finer points of wound packing: opening the gauze package, keeping a finger on the bleed, feeding gauze between hands, and working both quickly and precisely. There is no wasted time spent perfecting this technique.
TAMPONS DON’T WORK.
Compression bandage
Compression bandages are like a regular ace bandage but with the addition of some plastic hardware that allows you to create direct, downward pressure into the wound. These can be used on their own to slow bleeding but are best used in conjunction with wound packing, and I consider securing already packed gauze to be their main purpose. There are a few different kinds but the broad strokes are the same: tight wraps and direct pressure on the wound.
I carry a Rhino Rescue Israeli Bandage in my kit, and another on my person. These are pretty bulky and take up valuable space in the kit but it’s essential to have one should you need to secure a packed wound in order to move a patient to safety or into an ambulance.
Just like the rest of the gear, practice with this one! They can be tricky the first few times and you don’t want to be figuring it out when precious seconds are ticking by in a real scenario. I like to practice putting mine on my legs while I’m watching TV.
Notes on compression bandages:
Head & neck injuries can be tricky to wrap, so practice on your people!
If an already stabilized wound starts to bleed profusely through the bandage, you should undress and re-pack it; otherwise, DO NOT remove the bandage once it’s on.
Vented chest seals
These are an occlusive dressing to seal a sucking chest wound: a penetrative injury that is allowing air to enter the chest cavity. Lungs are surrounded by a thin membrane called pleural space that maintains negative pressure and assists the lung’s expansion; outside air filling this space will create positive pressure and collapse the lung. This is called an open pneumothorax.
Because there will already be air in the chest cavity by the time you apply the dressing, chest seals need to be vented in order to let that trapped air out, while keeping anymore air from getting in. If that air can’t escape, the patient can (and probably will) develop tension pneumothorax which will kill them quickly unless that trapped air is released with Needle Chest Decompression (NCD).
Chest seals are very easy to apply and can be improvised in a pinch, but unless you’re a combat veteran, I recommend you carry the real thing.
Notes on vented chest seals:
Chest seals are not a “set and forget” dressing. Monitor your patient closely for difficulty breathing and signs of tension pneumothorax. You may have to "burp” the seal, meaning you release one side and allow trapped air to escape, then re-adhere it.
If you’re not trained to use an NCD, you probably shouldn’t carry one; both knowing when to use it and sticking it into someone’s lung take training and experience. My friend who’s a nurse told me “if I’m gonna die anyway, I’d rather somebody at least try!” and I’ll leave that there. Just try to get that person to an ambulance as quickly as humanly possible.
Nasopharyngeal Airway (NPA)
An NPA is used to open an airway in the event of an obstruction, usually from maxillary (jaw) injuries. It’s a tube that comes in various thicknesses (6mm to 8.5mm) and goes into the patient’s nose with a little lube. These circumvent the need to open a patient’s mouth to insert an airway. I like NPAs because they’re easy to use they’re unlikely to trigger a gag reflex. The best way to practice is on yourself; it’s scary but it just makes your eyes water.
Notes on NPAs:
Different sizes fit different noses, so carry a few. Smaller folks will need a 6-6.5mm tube and larger folks will need 7mm or bigger. You want a snug fit, not a tight one.
These come in flimsy packaging so store them in a ziploc or something to keep the packaging from getting punctured. If you pull it out and it’s been compromised, it’s no longer sterile or safe to use.
Mylar blanket
Shock and blood loss—both symptoms of getting shot—cause a person’s body temperature to plummet, and hypothermia sets in at 95F. Space blankets are the unsung hero of any first aid kit, because a person can go hypothermic on a summer day and this is what will keep them warm. As soon as you’ve stabilized them and they can be left alone, wrap them up.
Notes on mylar blankets:
Most space blankets are designed to be visible from afar anyway, but make sure you buy a color that will clearly indicate a casualty to first responders. I carry oversized bright orange blankets from Bass Pro Shops but the classic reflective silver ones are great too. You can’t have too many of these.
Final thoughts
I can’t emphasize enough that gear without training is dead weight, and you will do more harm than good just winging it. I urge you to get whatever level of training your lifestyle allows, whether that’s a full semester of night classes at EMT school or just a Stop The Bleed course. Many leftist gun groups like the Socialist Rifle Association place an emphasis on field medicine and host training days and medical supply co-ops. Treat this stuff as you would any other organizing: by and for your community.
This stuff is dark, gory, depressing. Remember that your mental health matters too; after you’ve finished training with your tourniquets or practicing wound packing on a dummy that’s spraying fake blood all over you, take care of your spirit. Spend time doing your favorite hobbies, spend time with loved ones and animals, remember what you’re fighting for, and try to keep a light on in your life.
Good luck and Godspeed, comrade.
As an ambulance service worker this is >>
Thanks for sharing this. Appreciate your wealth of knowledge on these very delicate and intense situations